How to use the JIBB Admin Portal
Follow the instructions on this page to learn how to use the JIBB admin portal, add and assign roles to new users, and manage your account.

1. Admin Portal Overview
The JIBB Admin Portal is where you can manage the users, devices, and connections of your JIBB account.
To access the JIBB Admin Portal, you will need to be a paid license account owner, or an assigned admin user of the account. To view the portal, go to app.jibb.ai/admin and log in using your JIBB account.
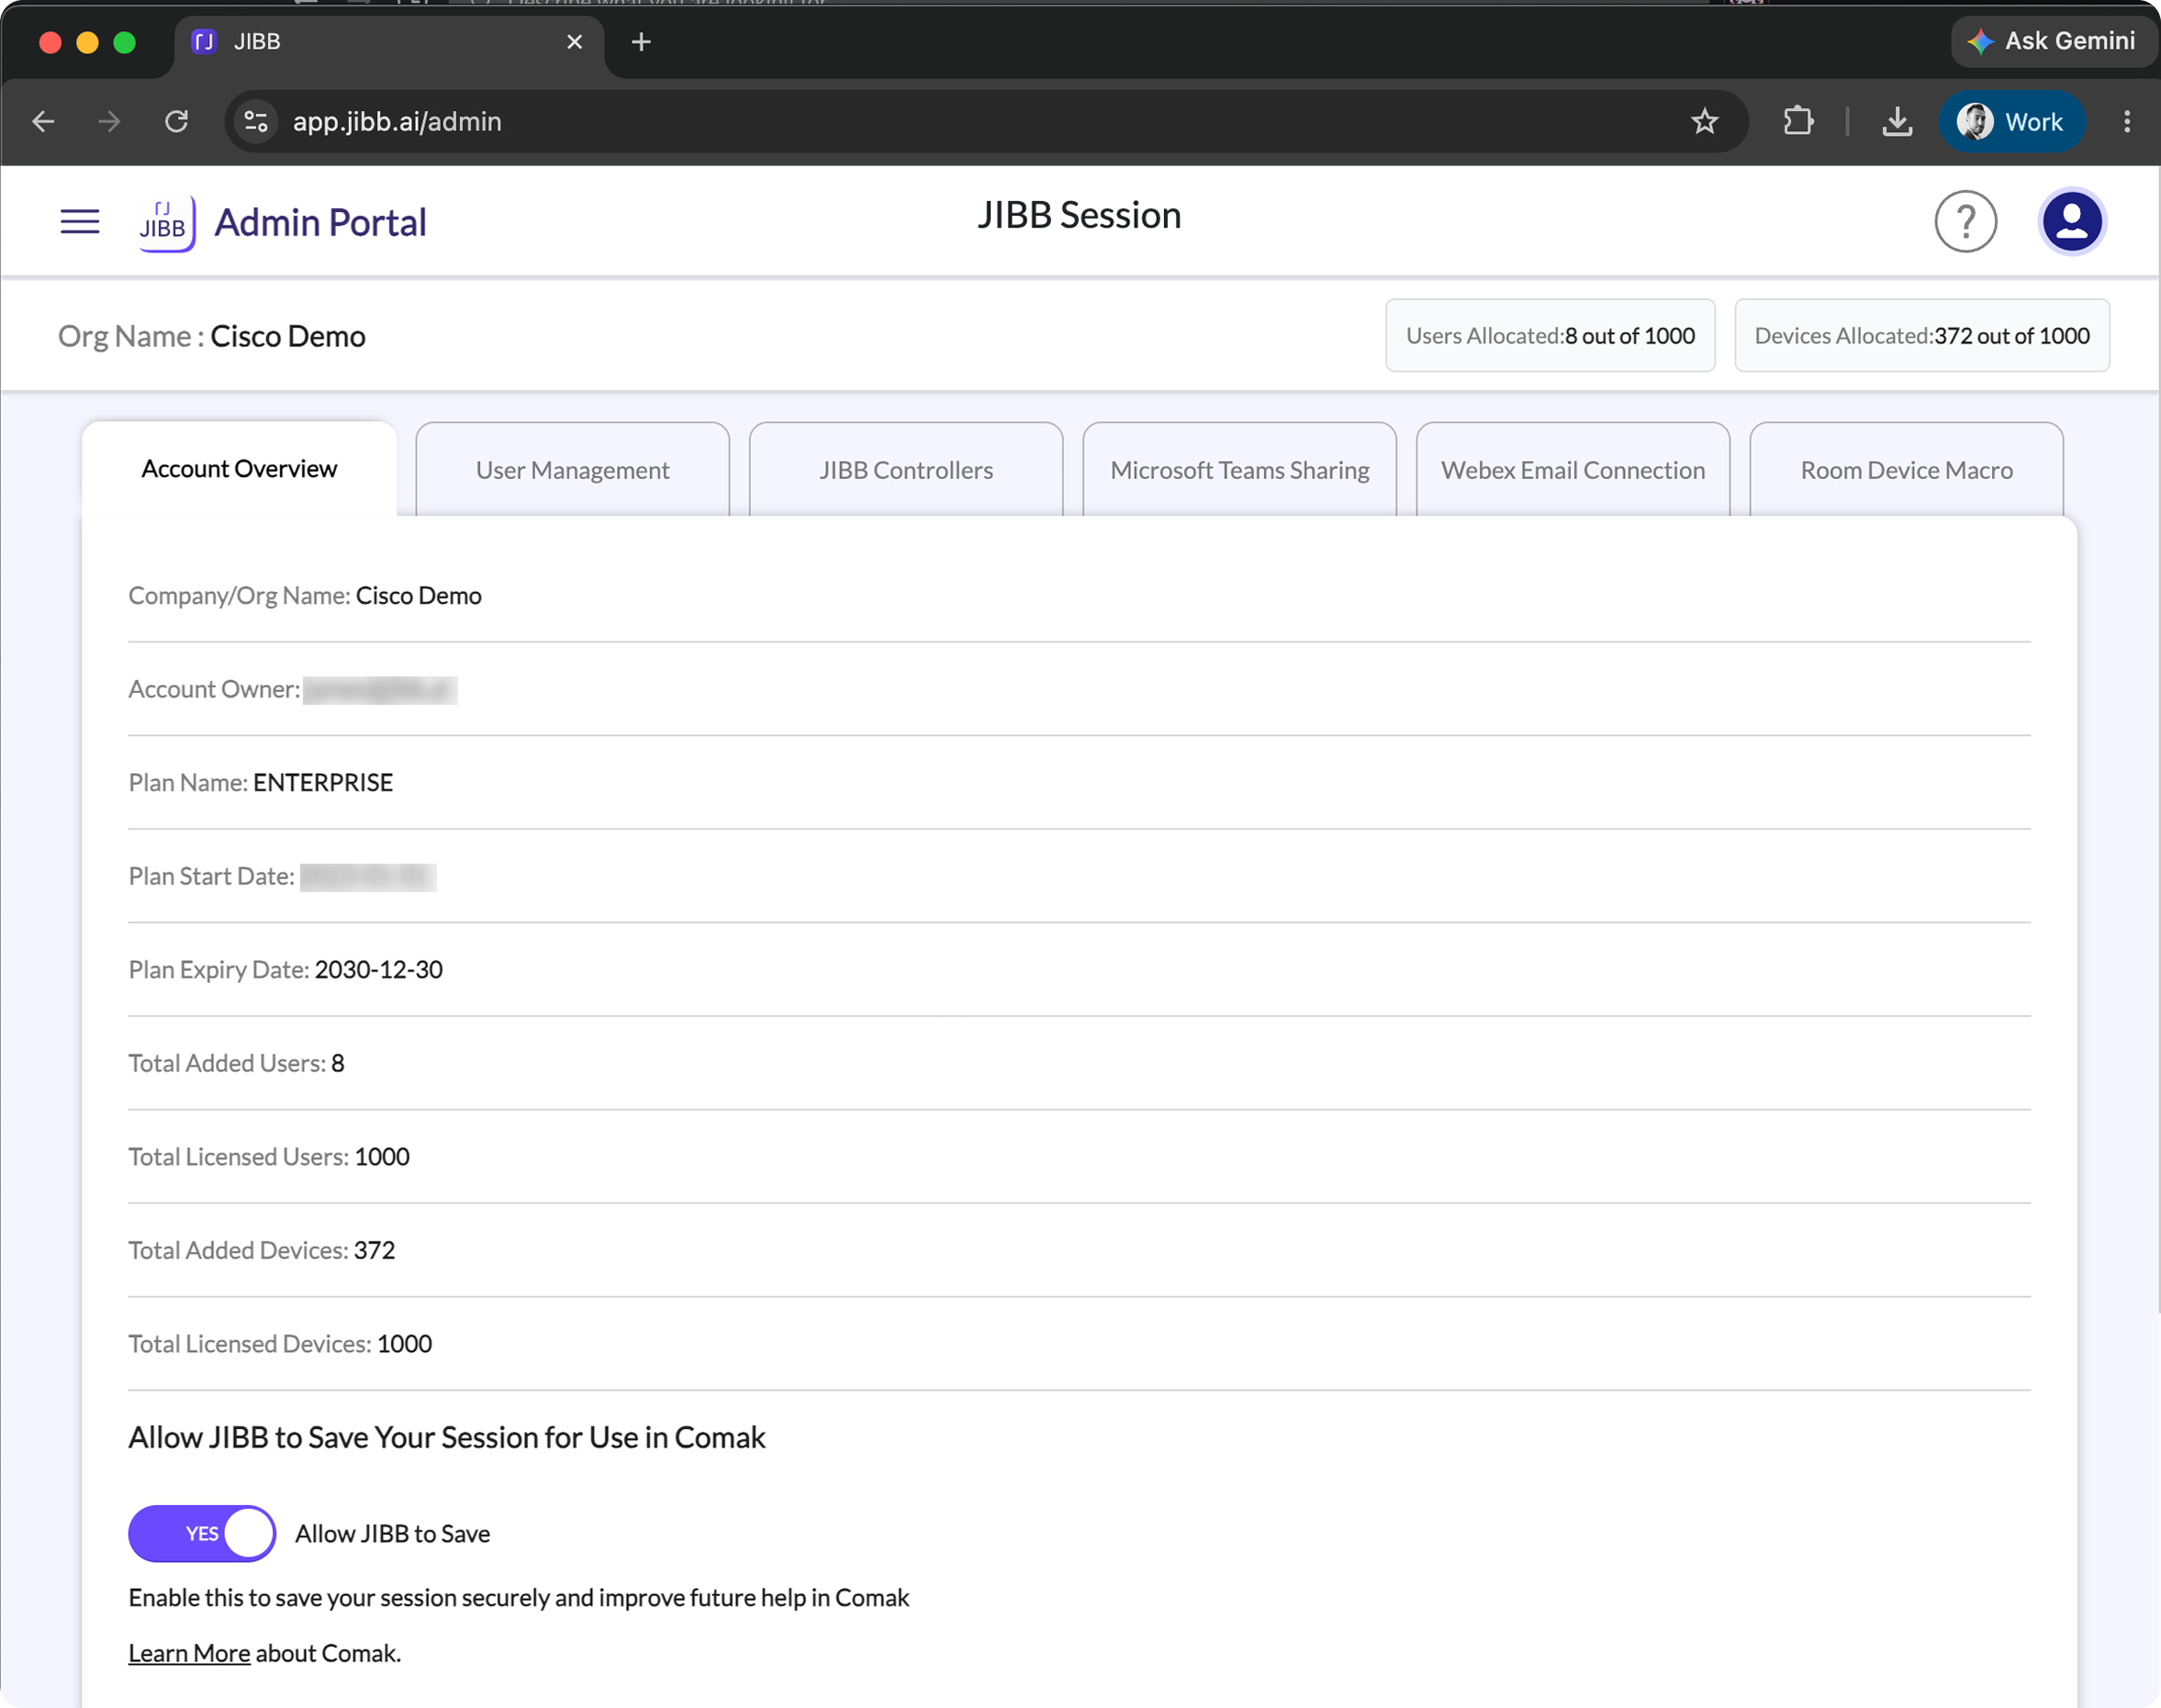
The admin portal consists of the following tabs:
- Account Overview: See your allocated licenses, devices, account information, and permission controls.
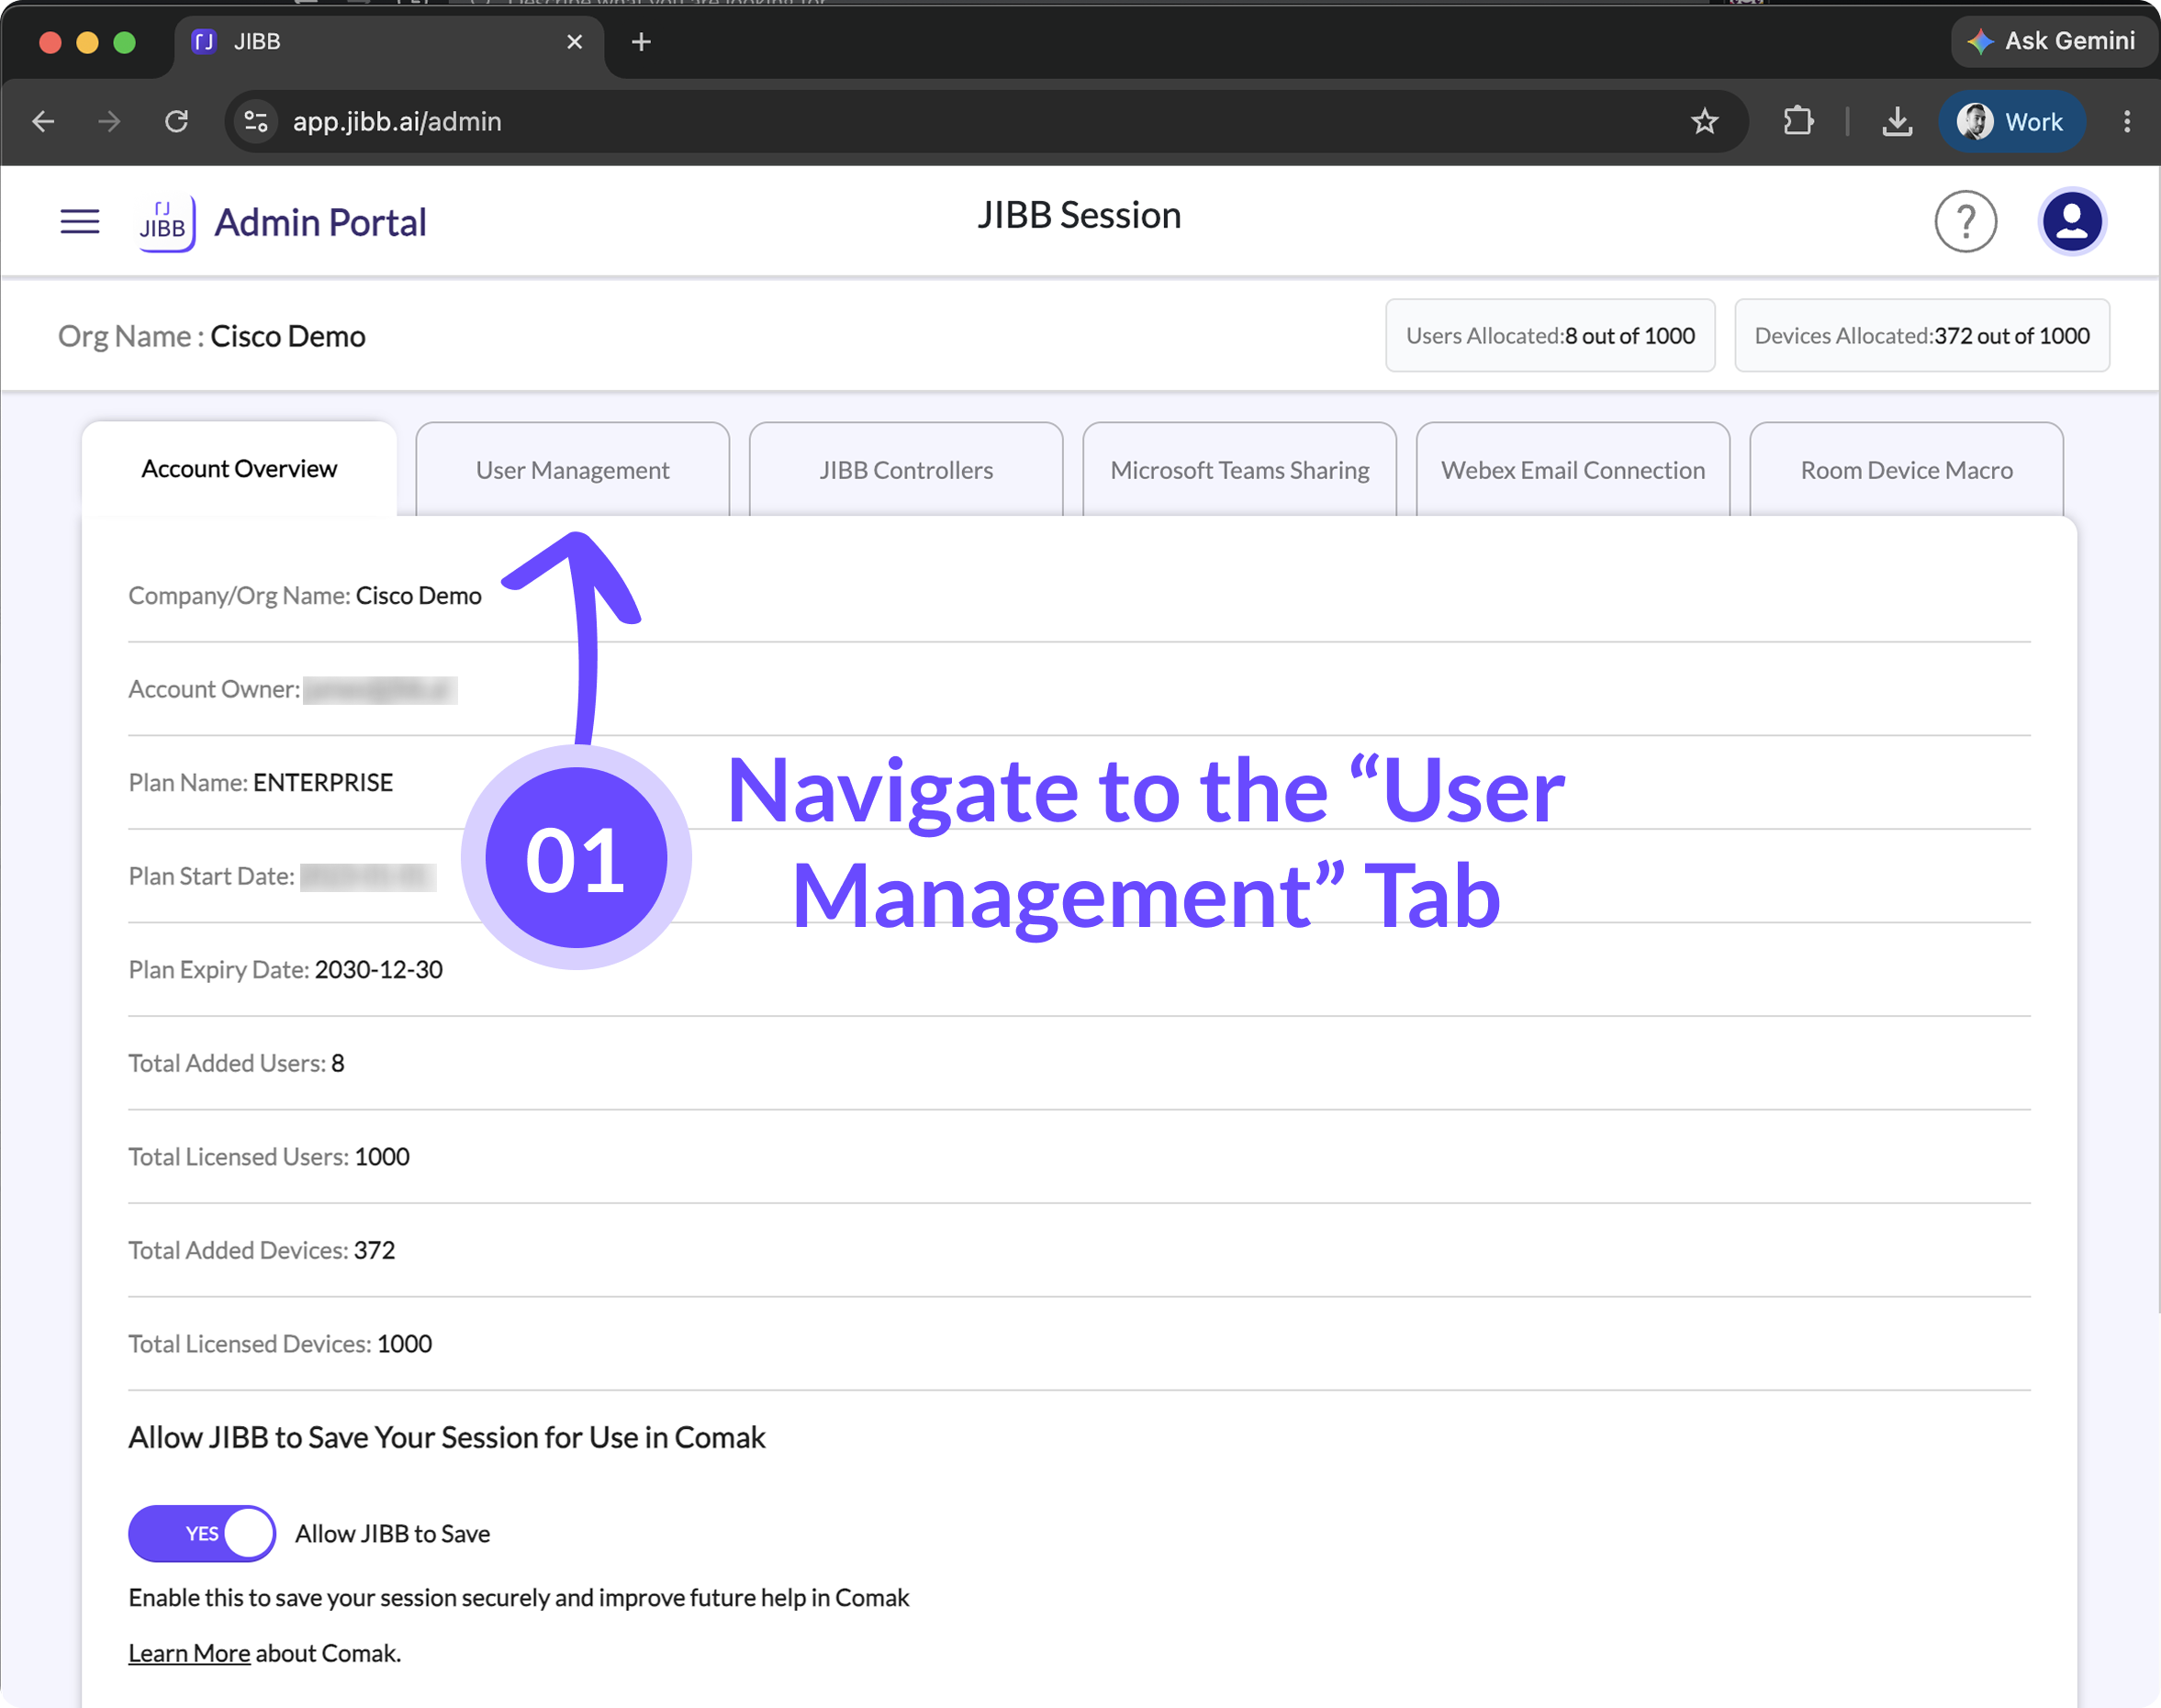
- User Management: Add, remove, or update users.
- JIBB Controllers: Manage the licences of your JIBB controllers.
- Microsoft Teams Sharing: Connect your Microsoft 365 tenant to JIBB to enable the Collaboration Assistant.
- Webex Email Connection: Connect JIBB to Webex so your room device can use active Webex meeting details when no email is entered on the device.
- Room Device Macro: Allocate your JIBB licenses and install the JIBB Macro on your device.
Getting More Licenses
The number of users you can add will depend on what kind of licenses you have purchased.
If you would like to add more users, please contact sales@jibb.ai to order more user licenses.

2. Adding Users
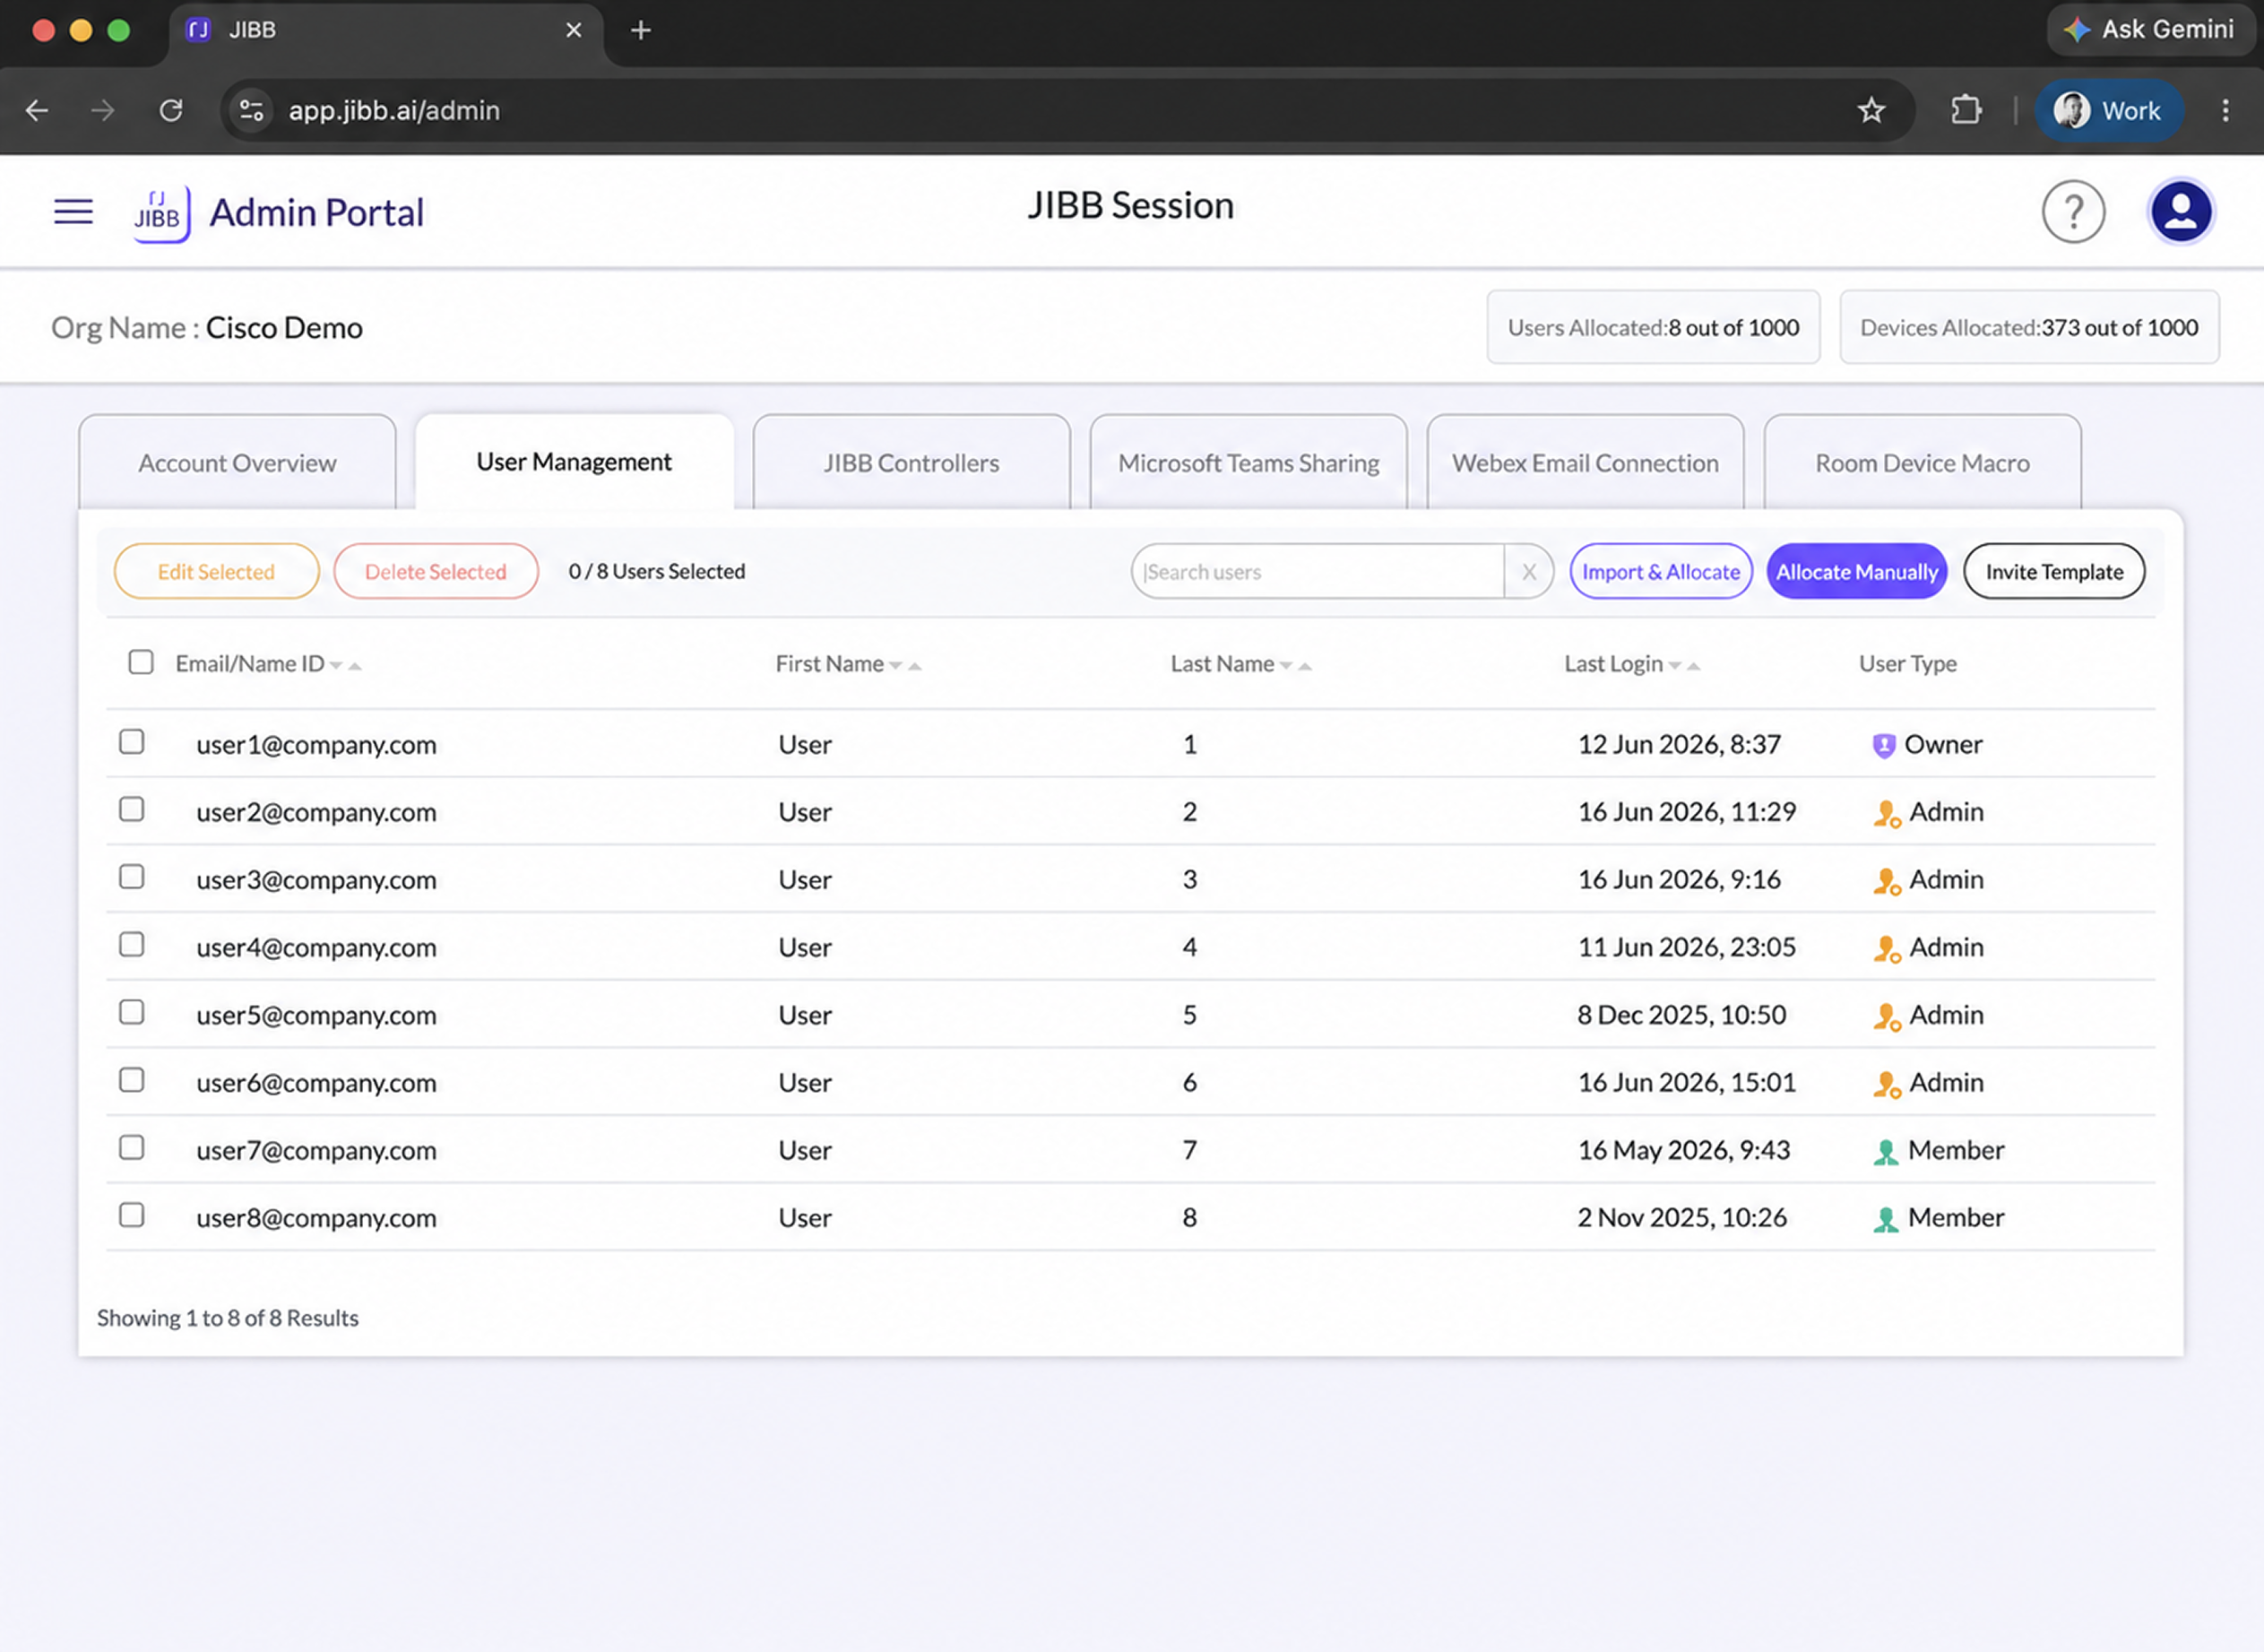
You have the option of adding users manually via email address, importing via CSV file, or sending an invite template.
Two main types of users/roles can be added:
Admins
Have the ability to access the Admin Portal, add/edit/remove other users, and manage device configurations, as well as generate API keys for JIBB Room Licenses. By default, account owners are JIBB admins and will need to add and assign other users as admins for them to have access to the Admin Portal.
Members
Only have access to JIBB Workspace/Comak and do not have access to the admin portal.
To get started, navigate to the User Management tab in the Admin Portal.
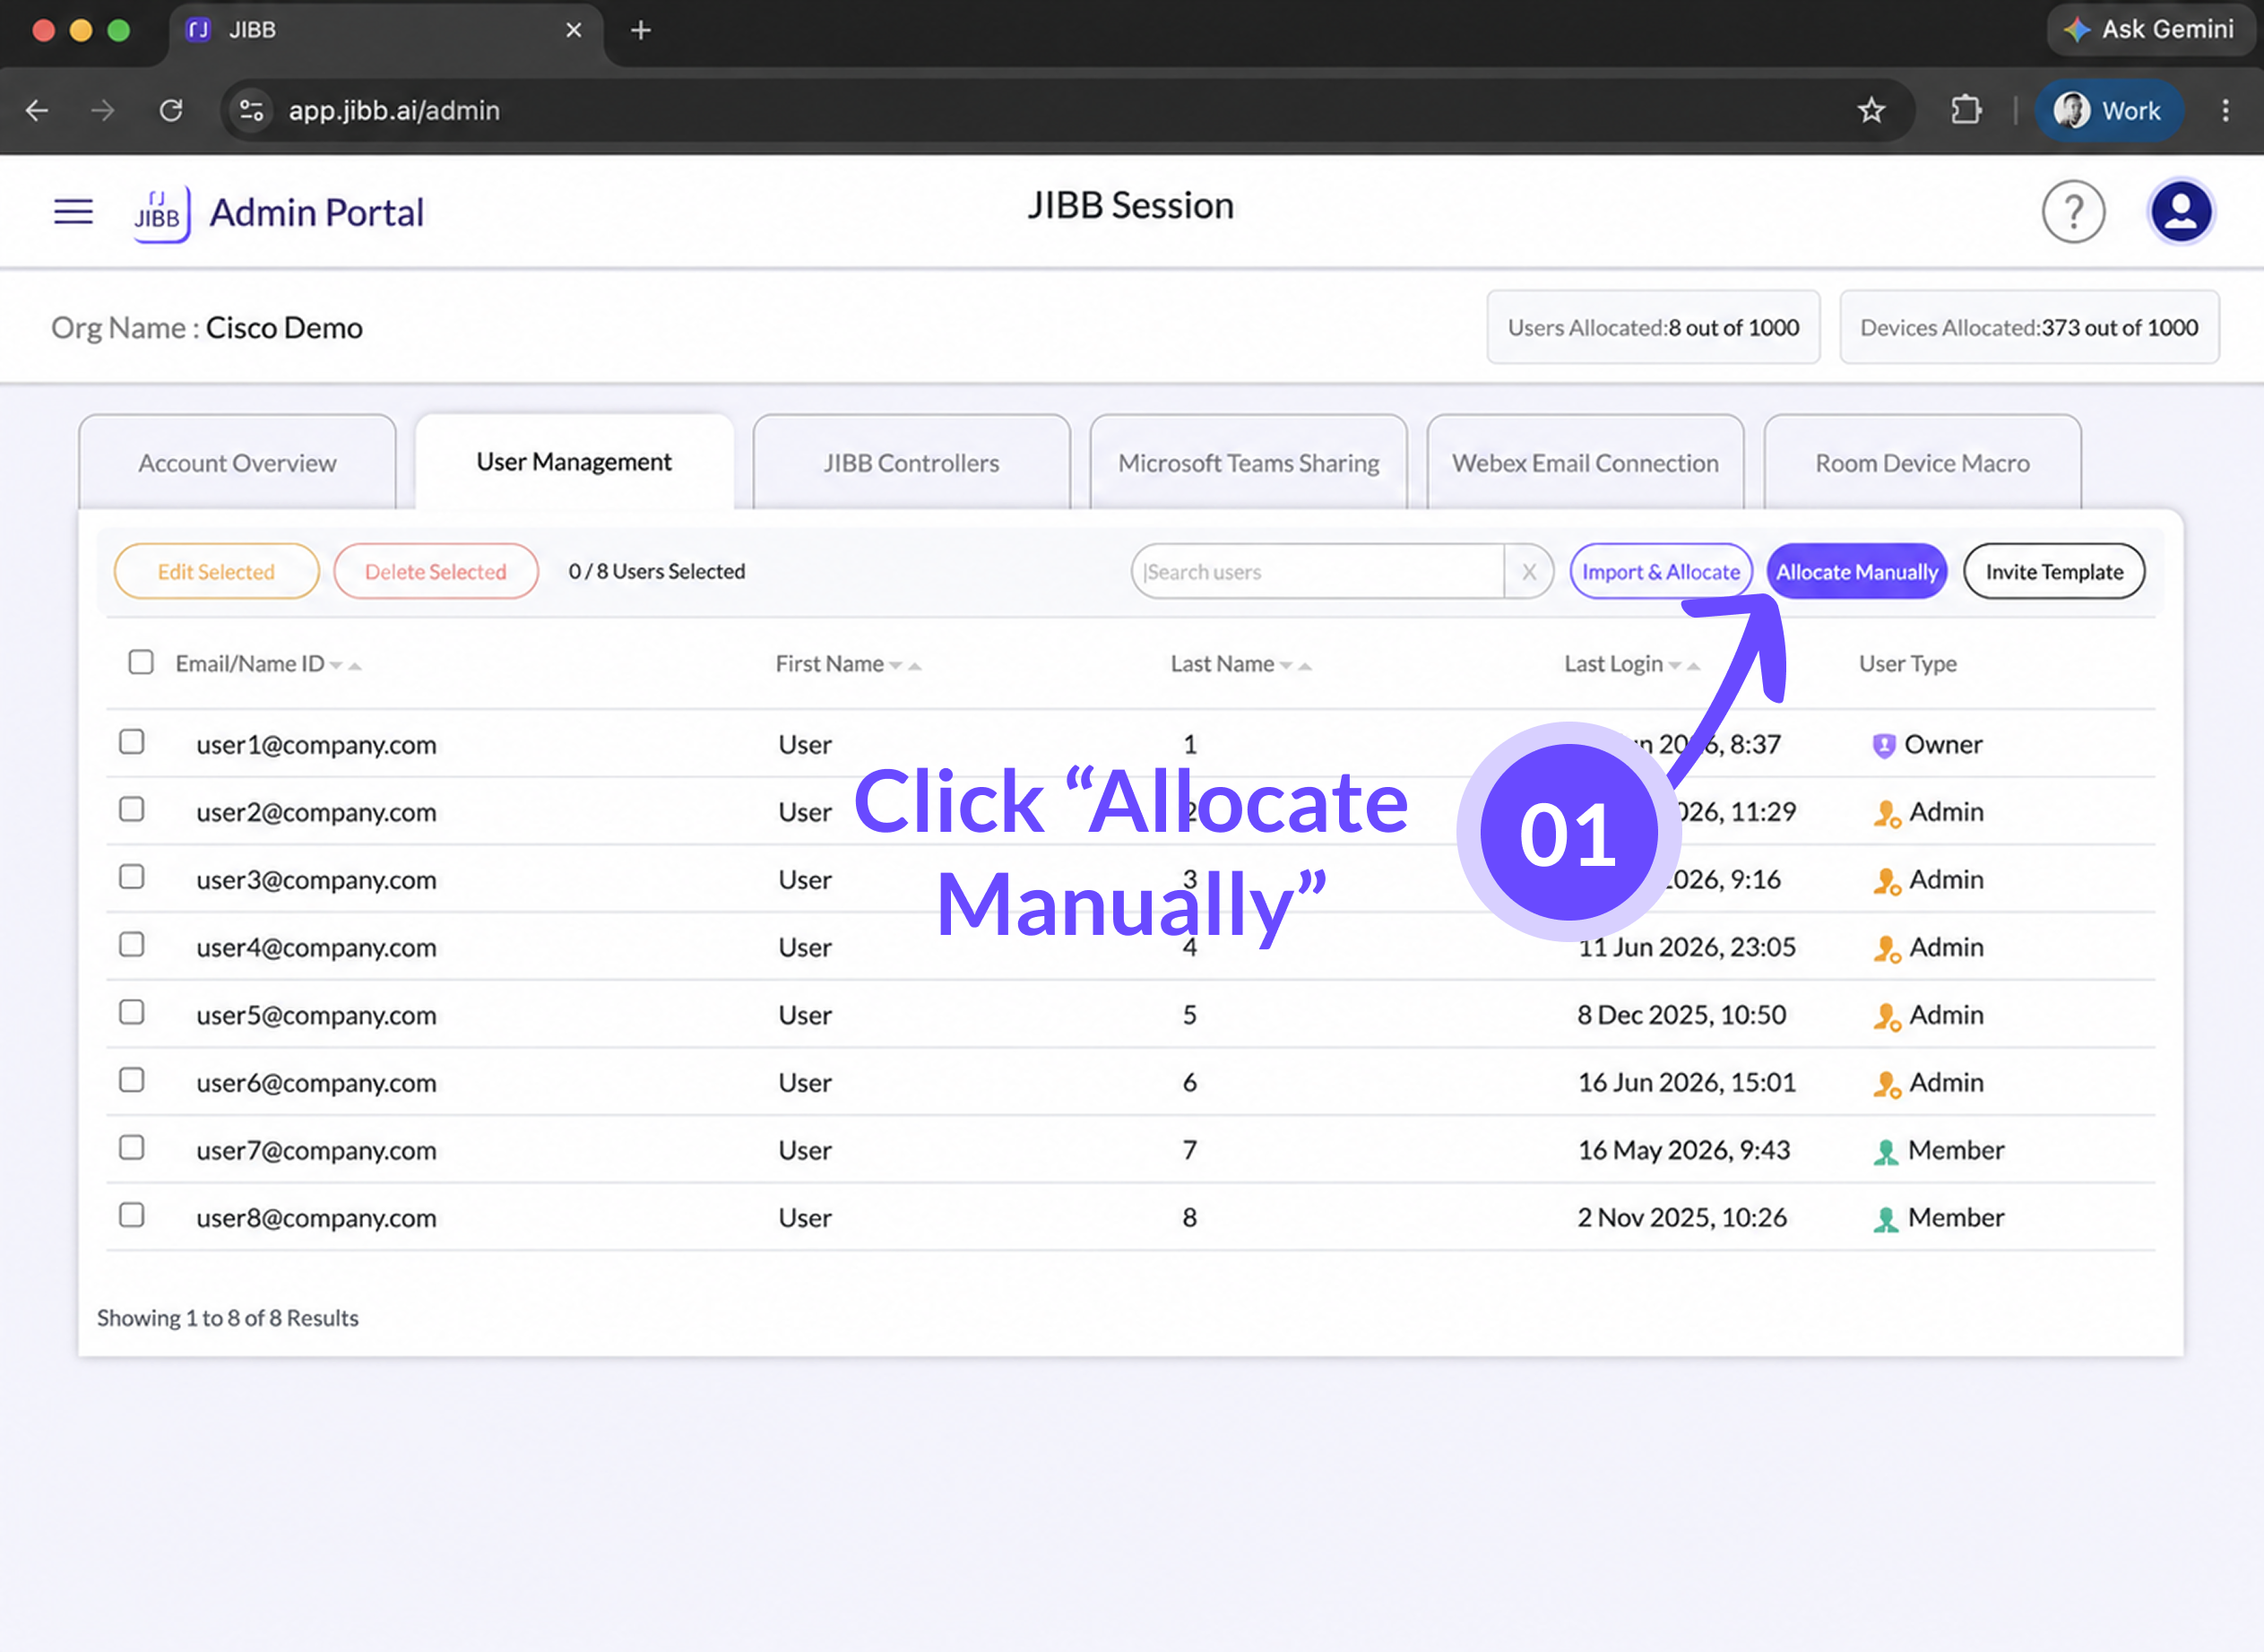
2.1 - Adding Users via Email Address
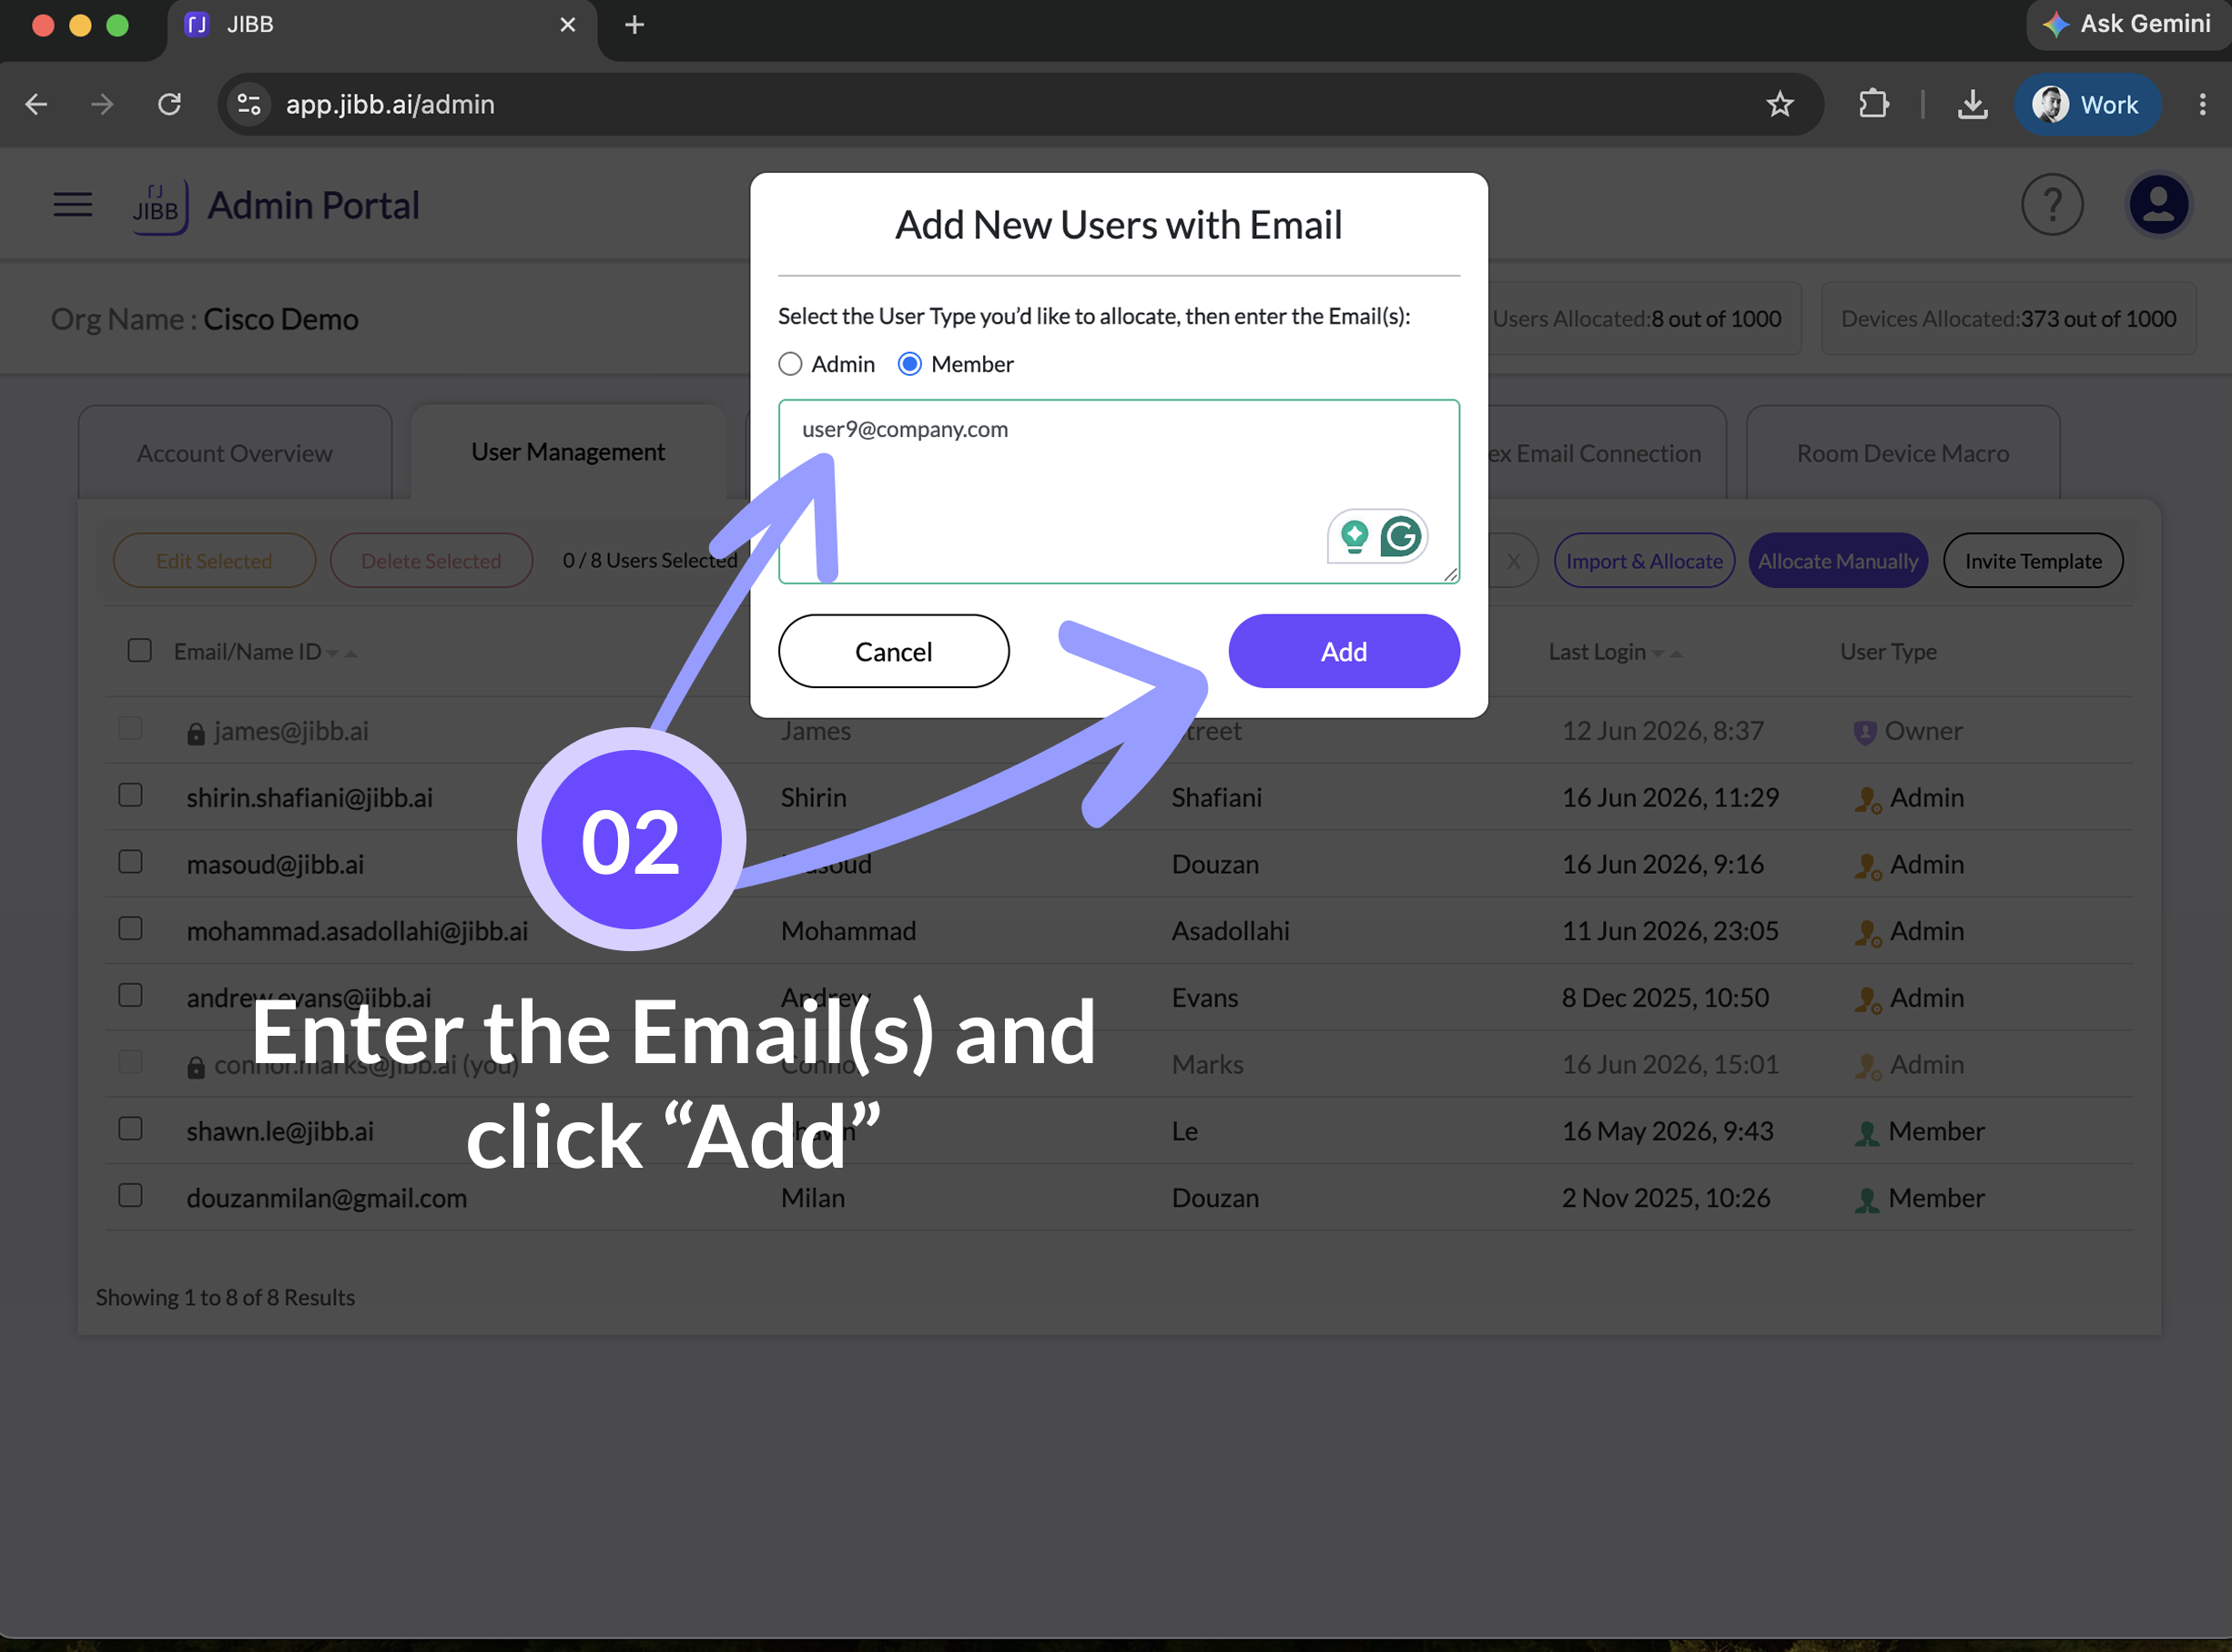
Once you’ve logged into the Admin portal and have the User Management tab selected, click on “Allocate Manually,” and a window will pop up where you can select the type of user role you want the new user(s) to have.
After selecting the user type, enter their email address, and if adding multiple people, separate each email with a comma. Once you’ve entered the emails, click on “Add”. The new users you added will automatically get an email invitation to activate their account.
2.2 - Adding Users via CSV
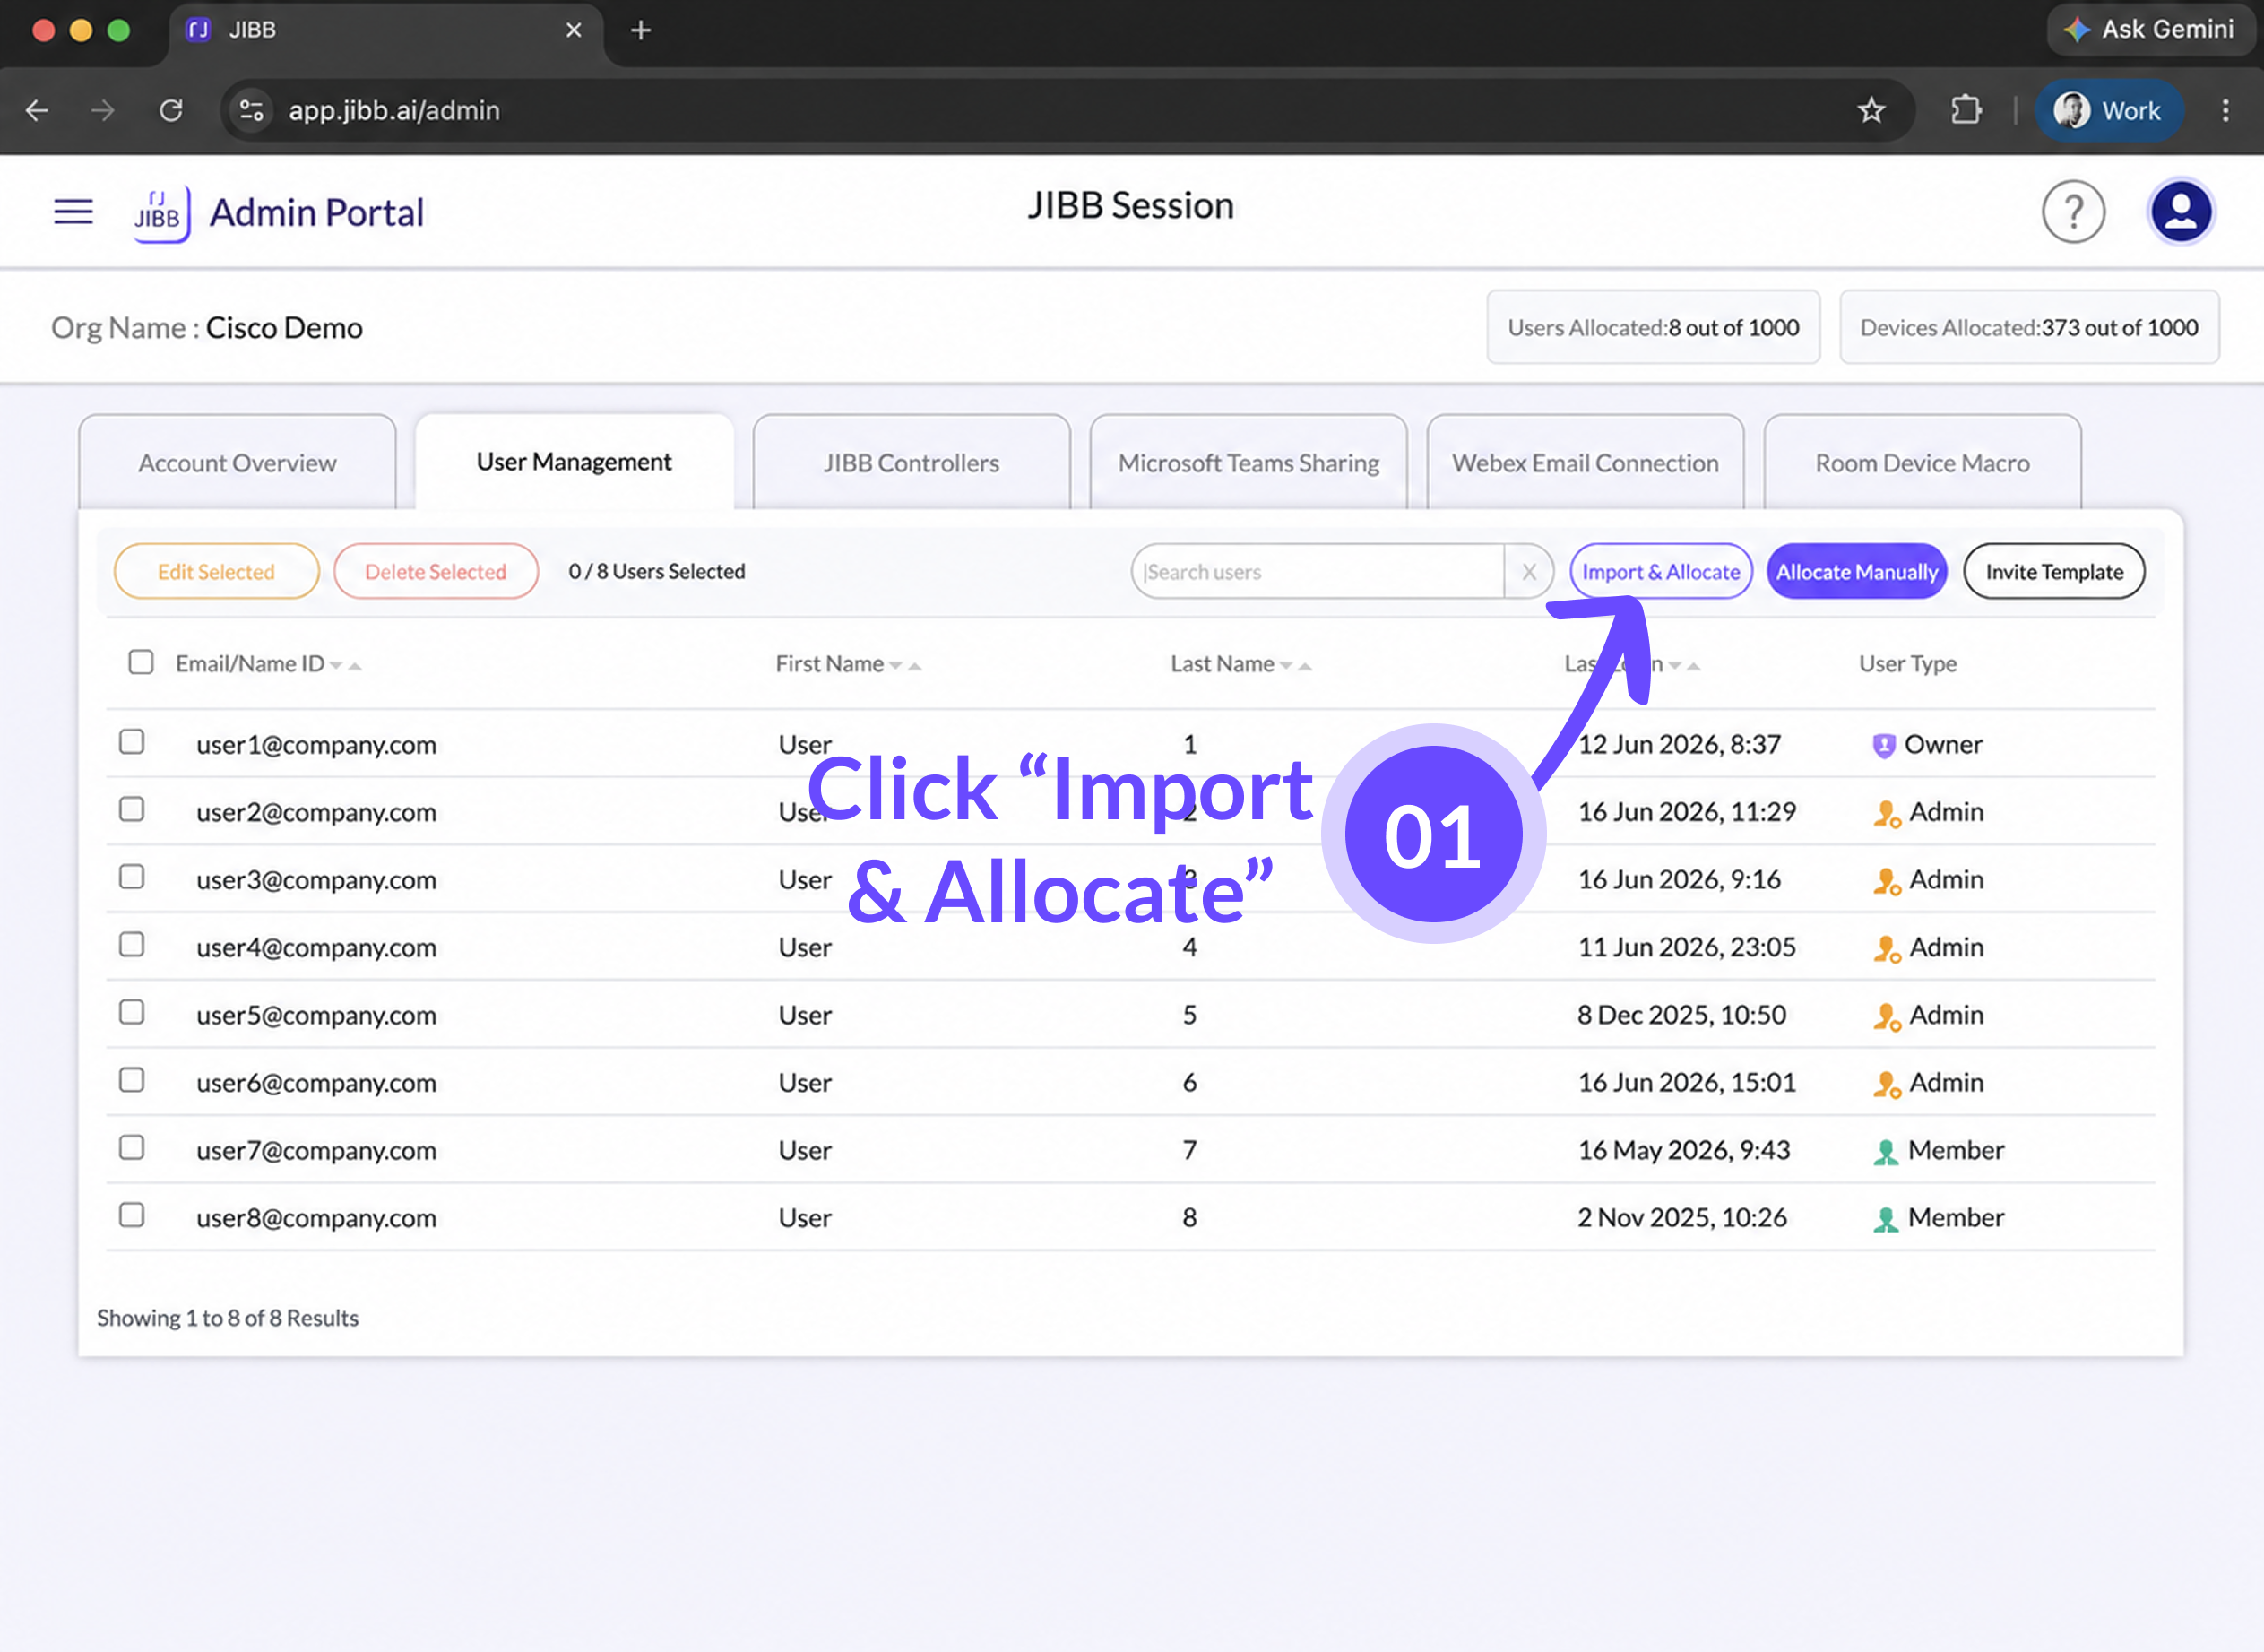
If you want to add multiple users at once without manually typing their email addresses, you have the option to import a CSV file. Click on the “Import & Allocate” button.
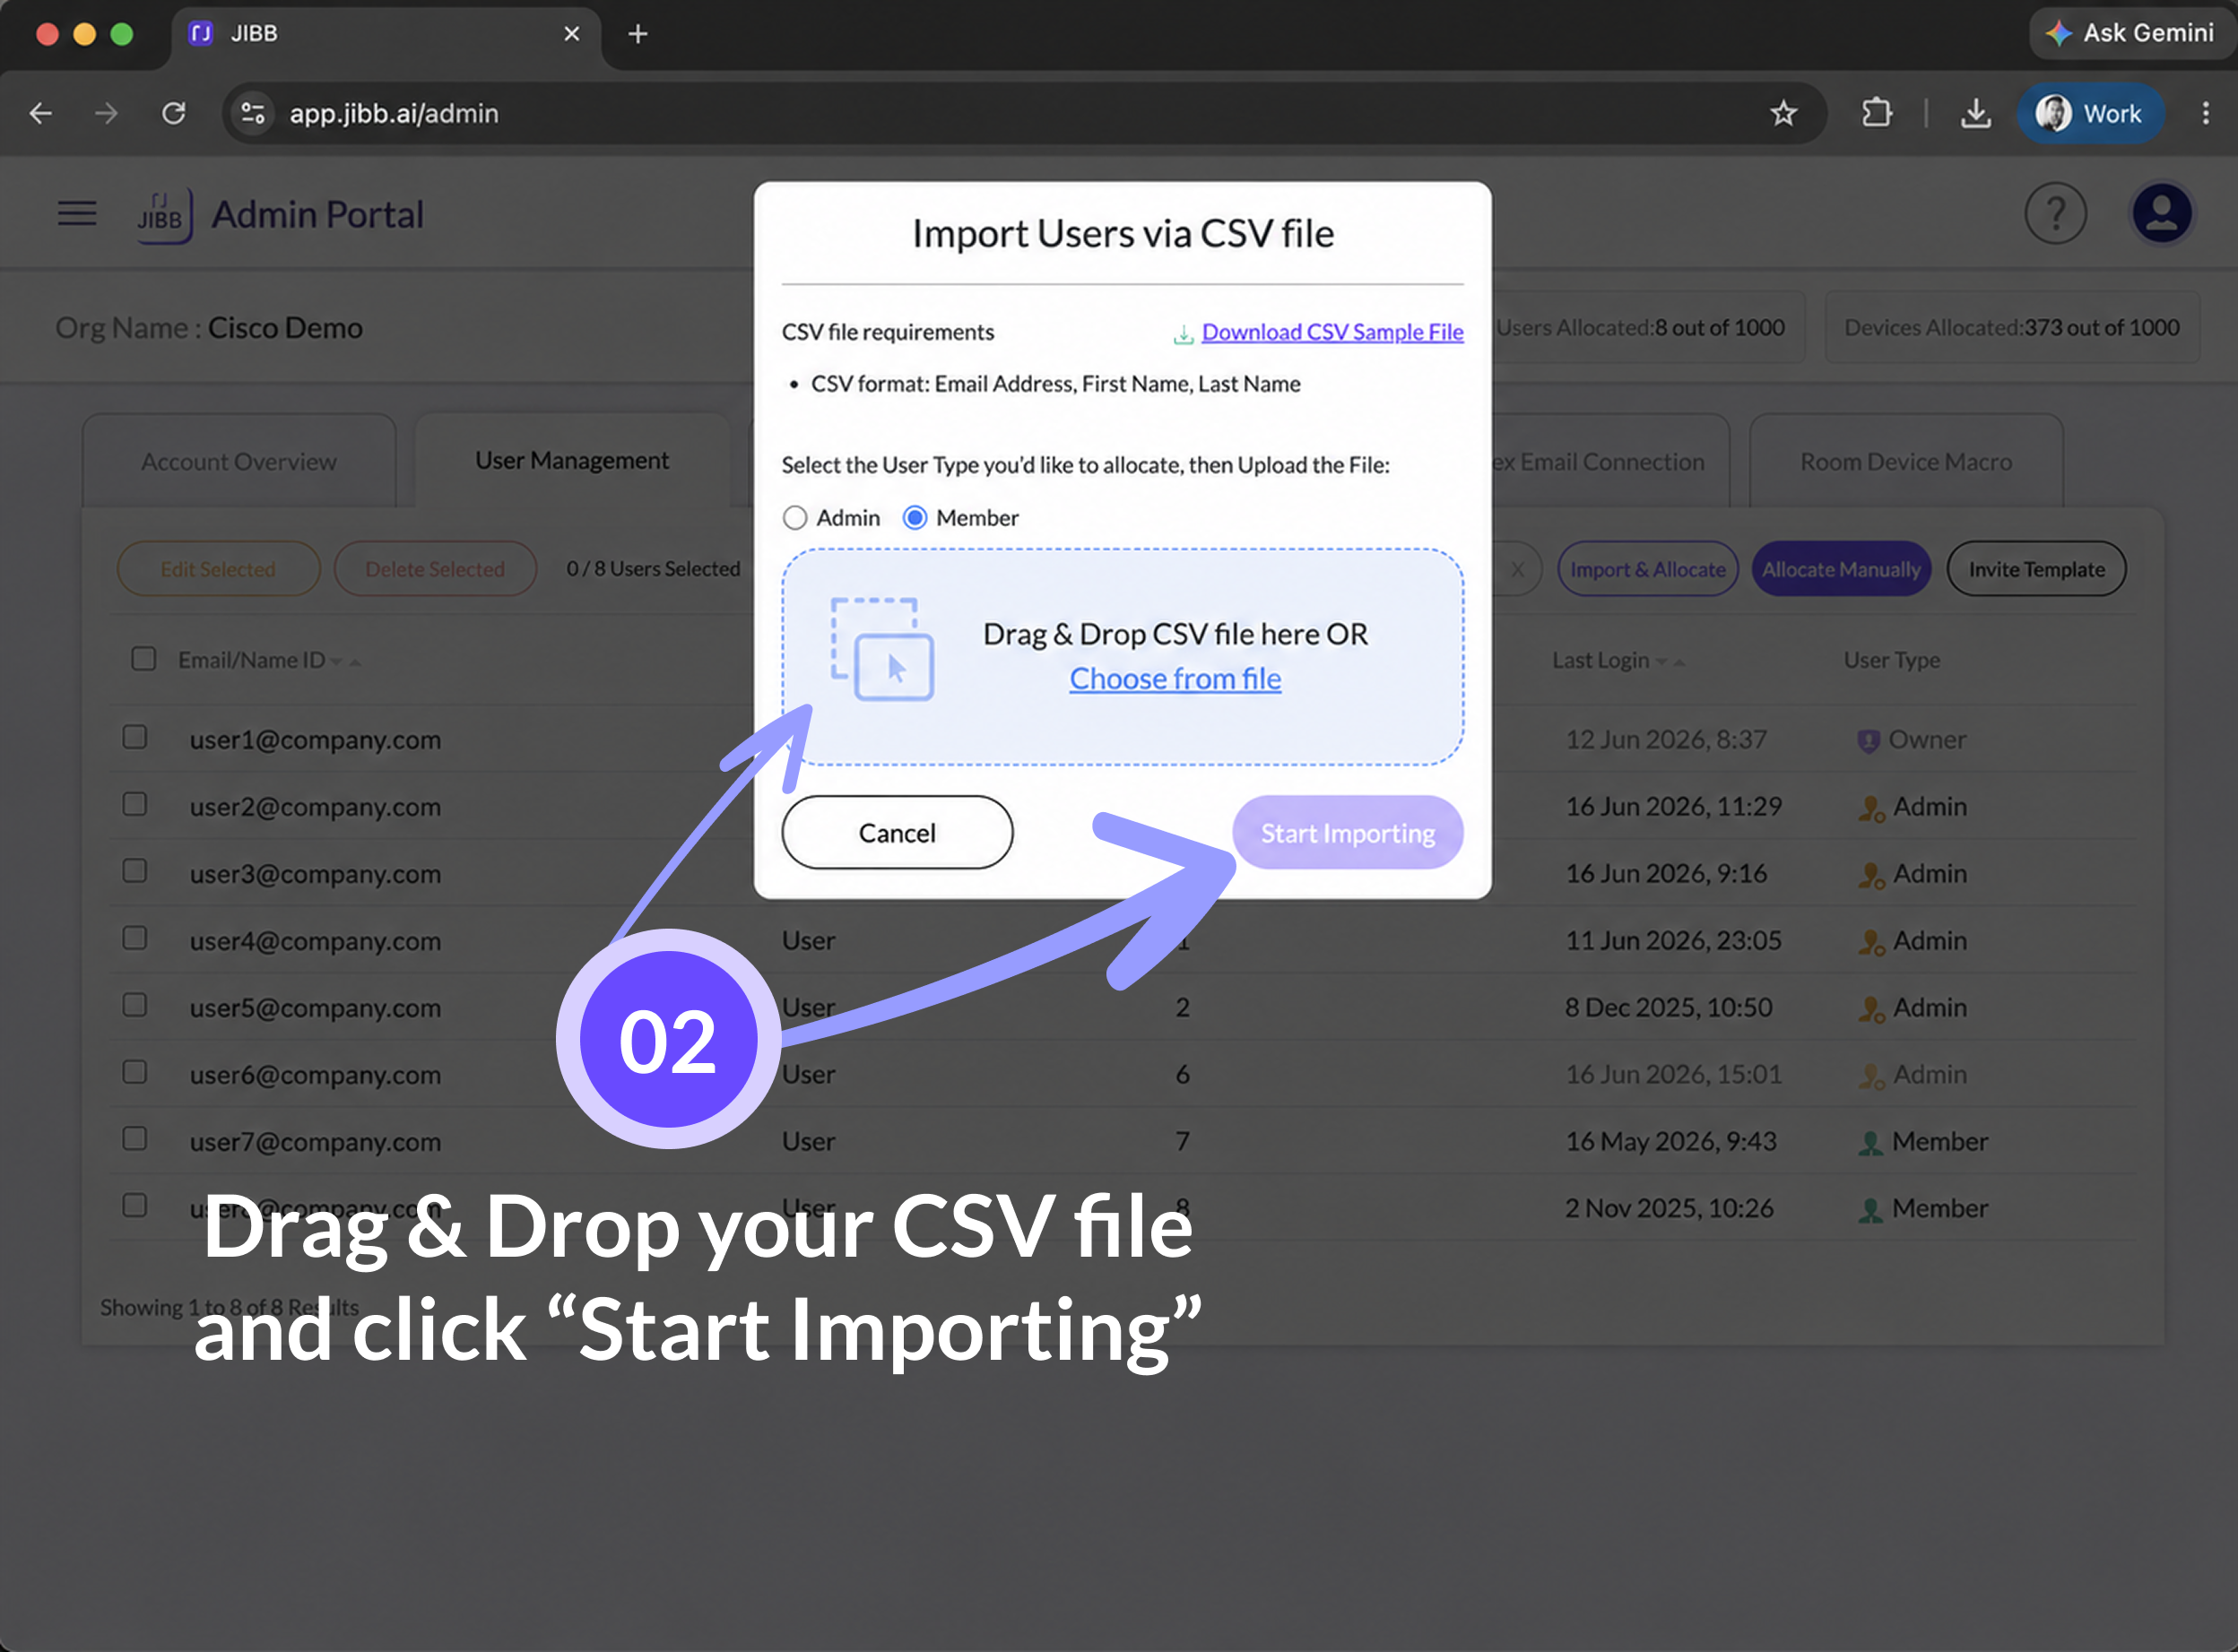
Select the type of users you want to add. We recommend having a CSV file for Admins and a separate CSV file for members. Alternatively, you can add all members to a single CSV file and then select and bulk edit the ones you want to change to Admins.
2.3 - Formatting your CSV File
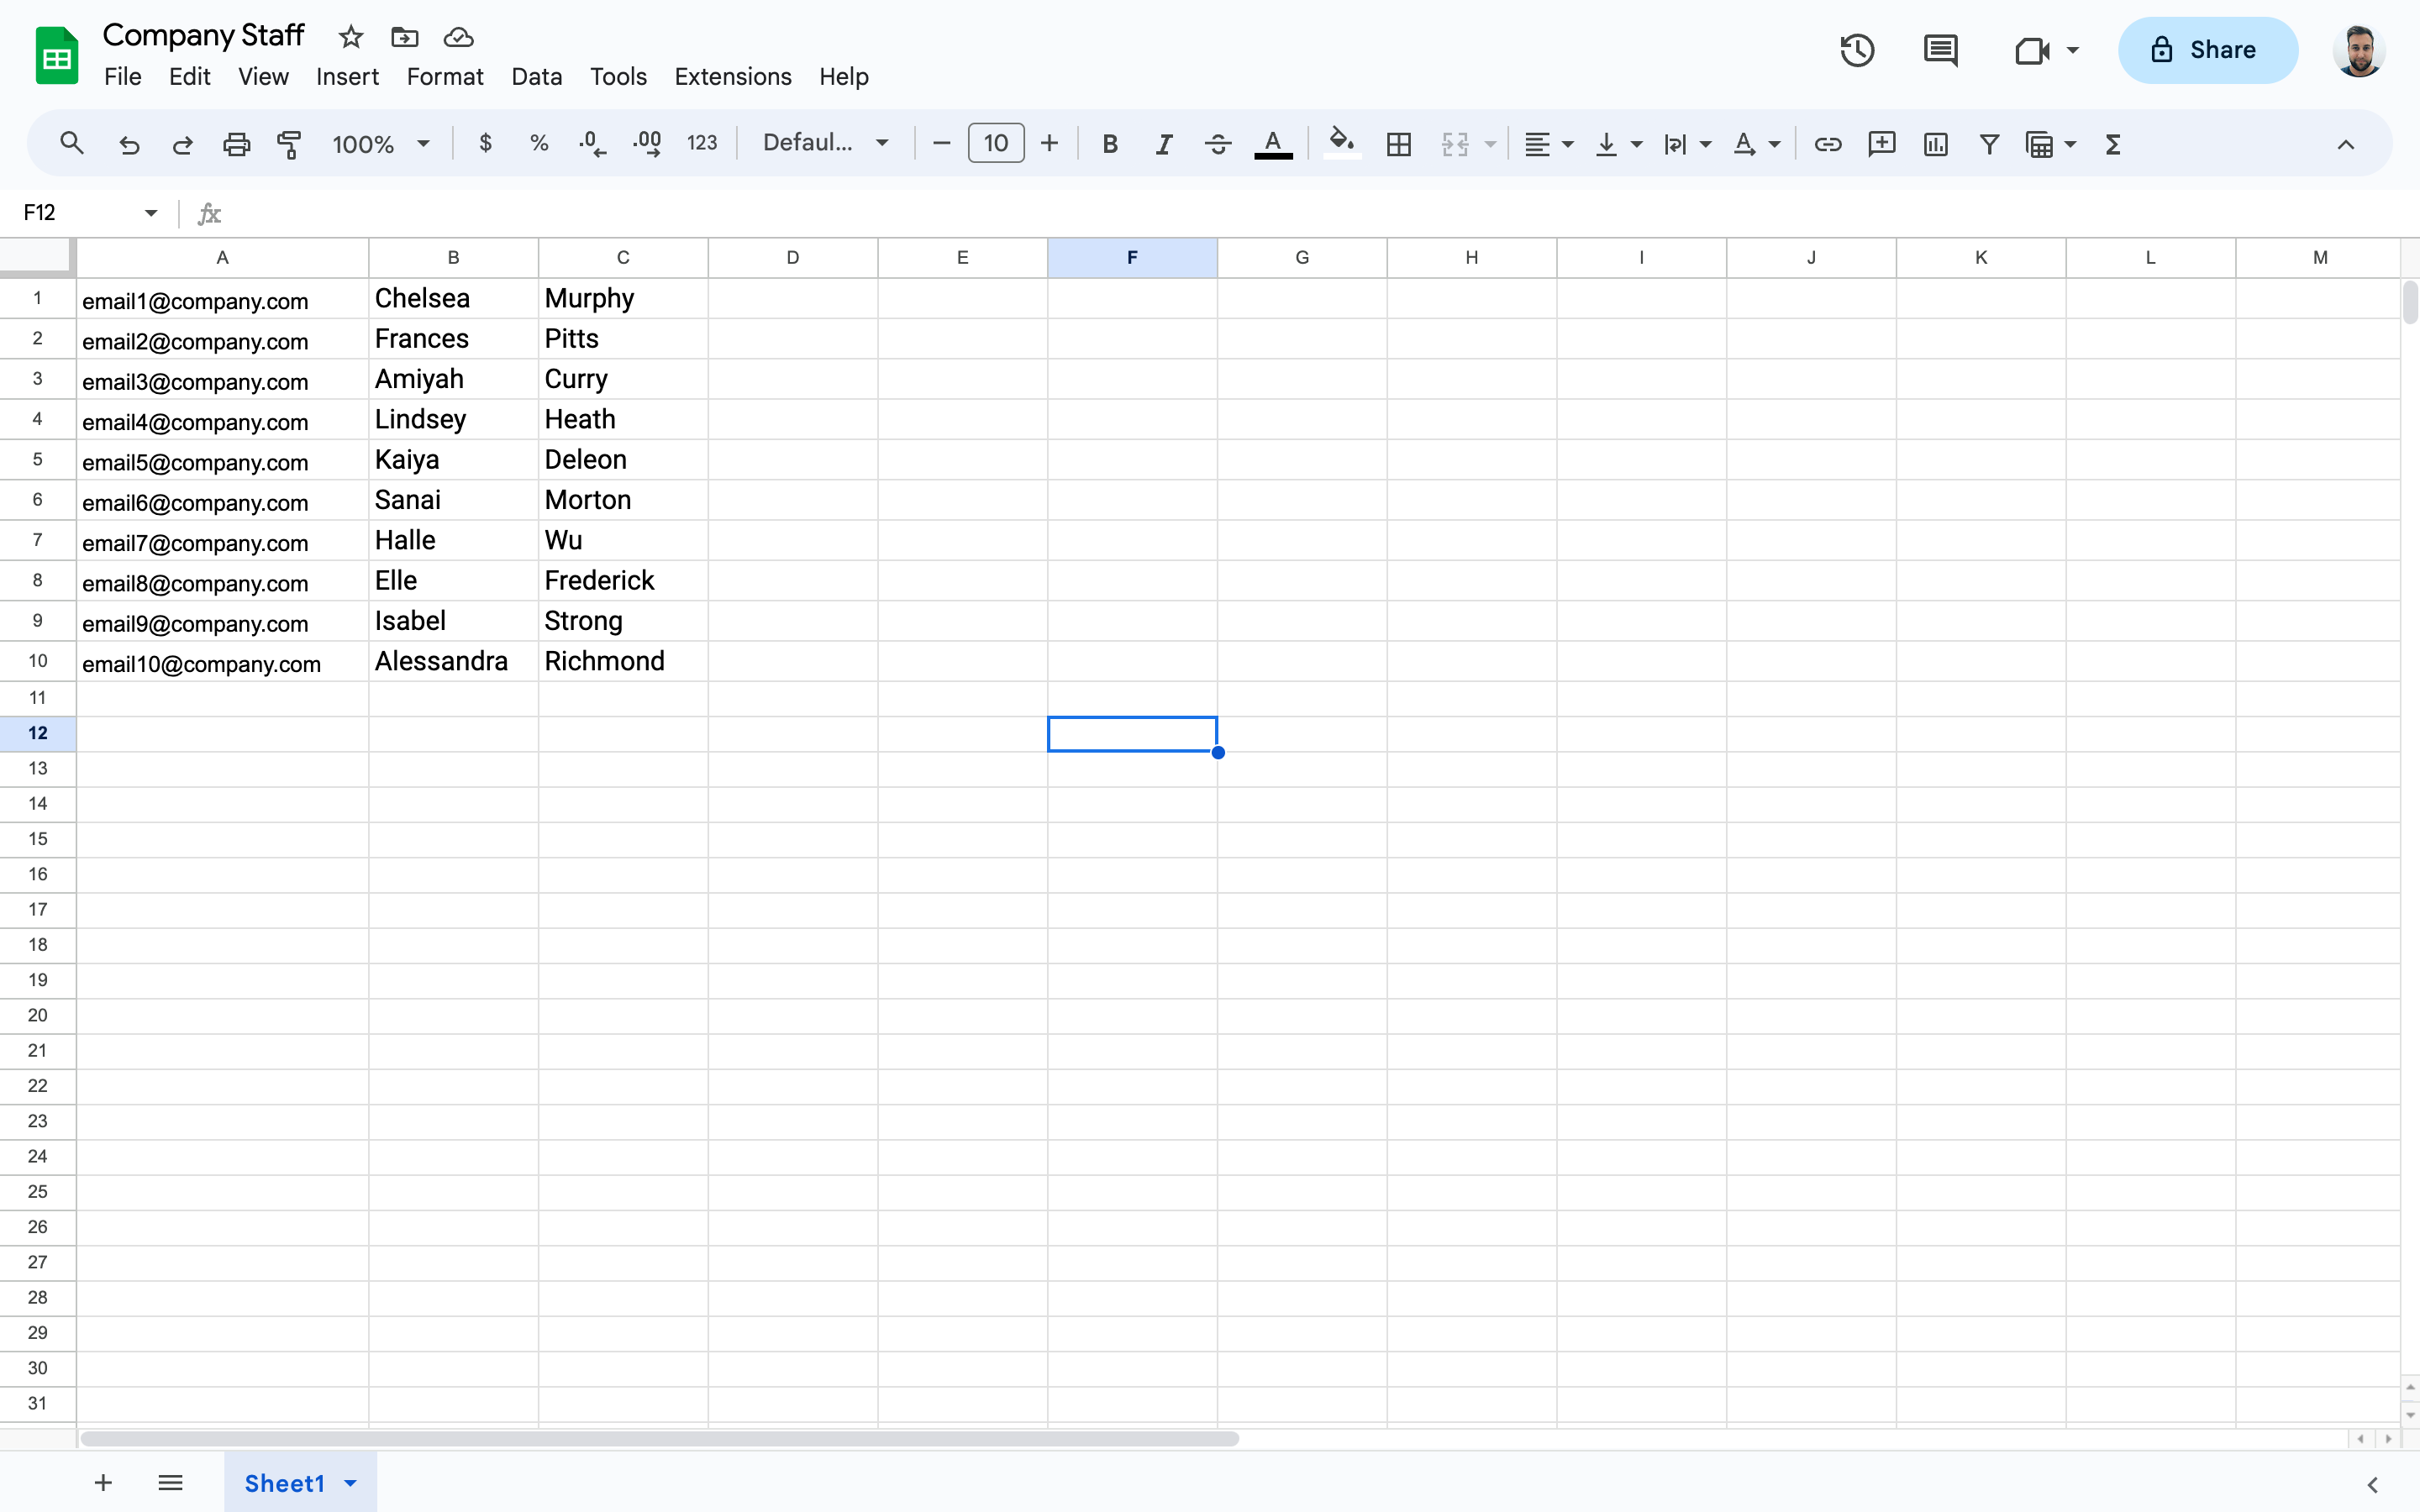
You should format the CSV with the 1st column populated with their email address, the 2nd column with their first name, and 3rd column with their last name. Do not include any other information.
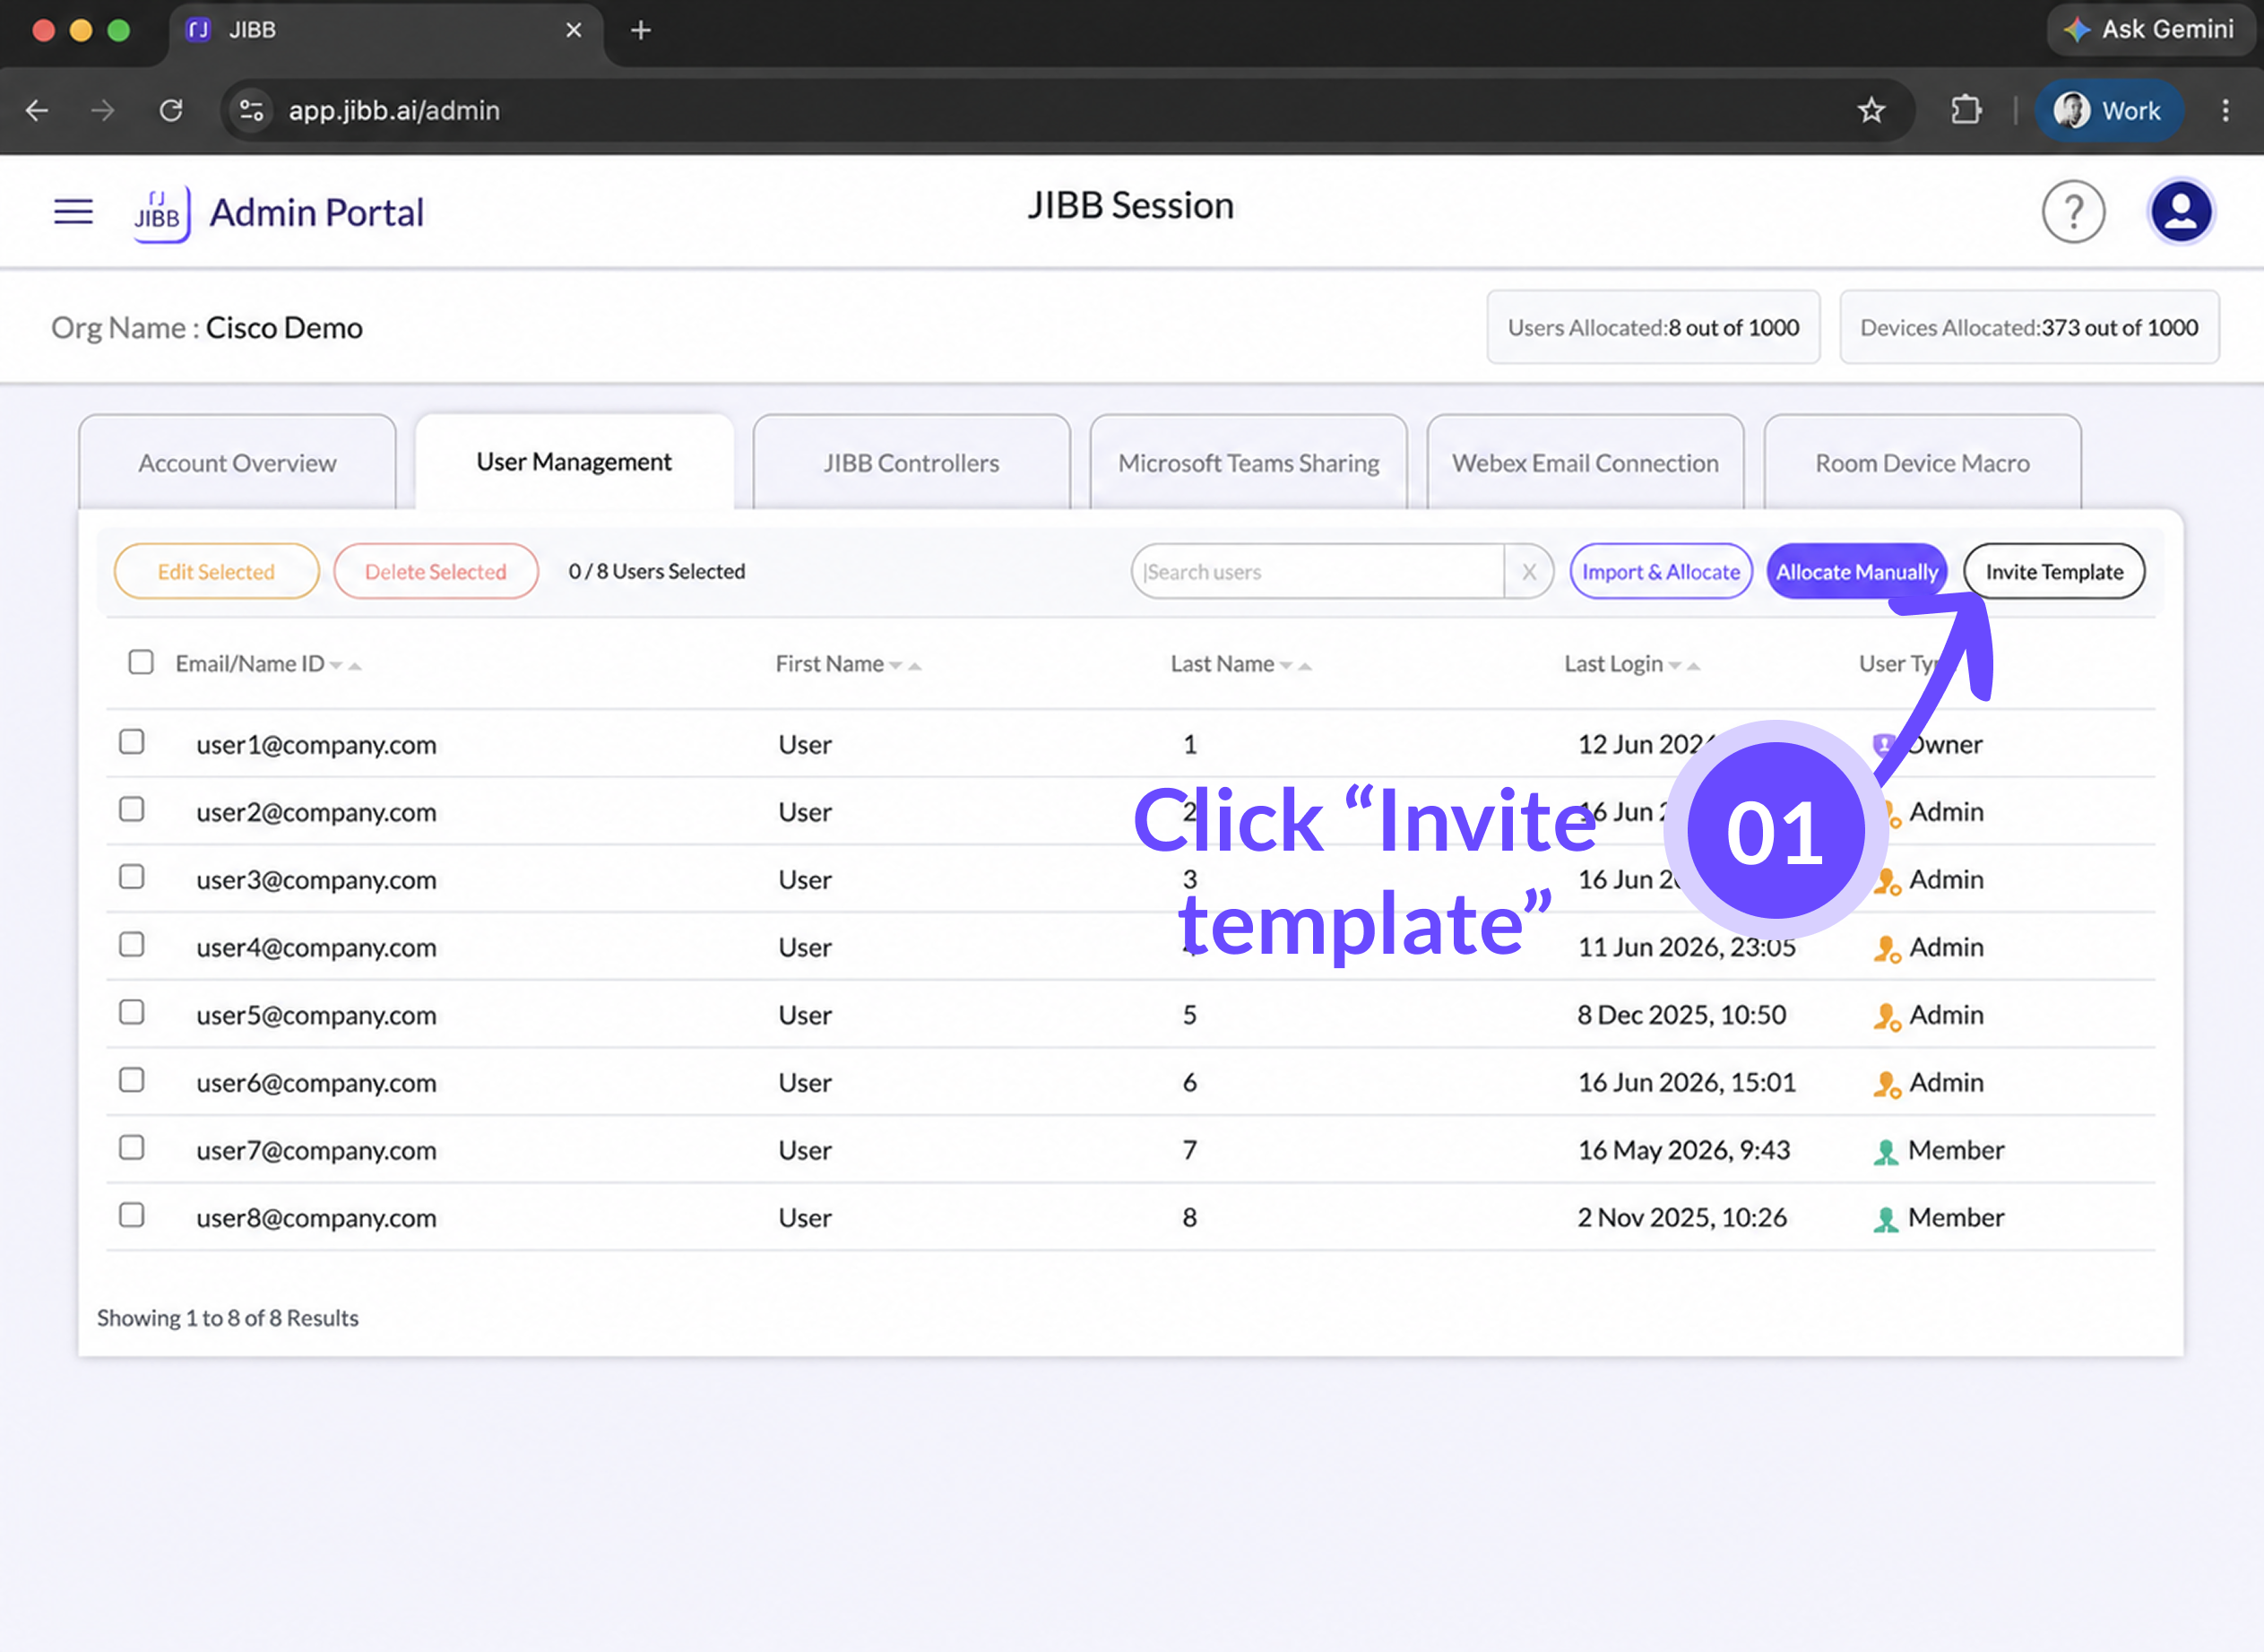
2.4 - Adding Users via the Invite Template
If you would like more options on where users receive an invite, you can copy and paste the invite template and send it through the platform of your choice.
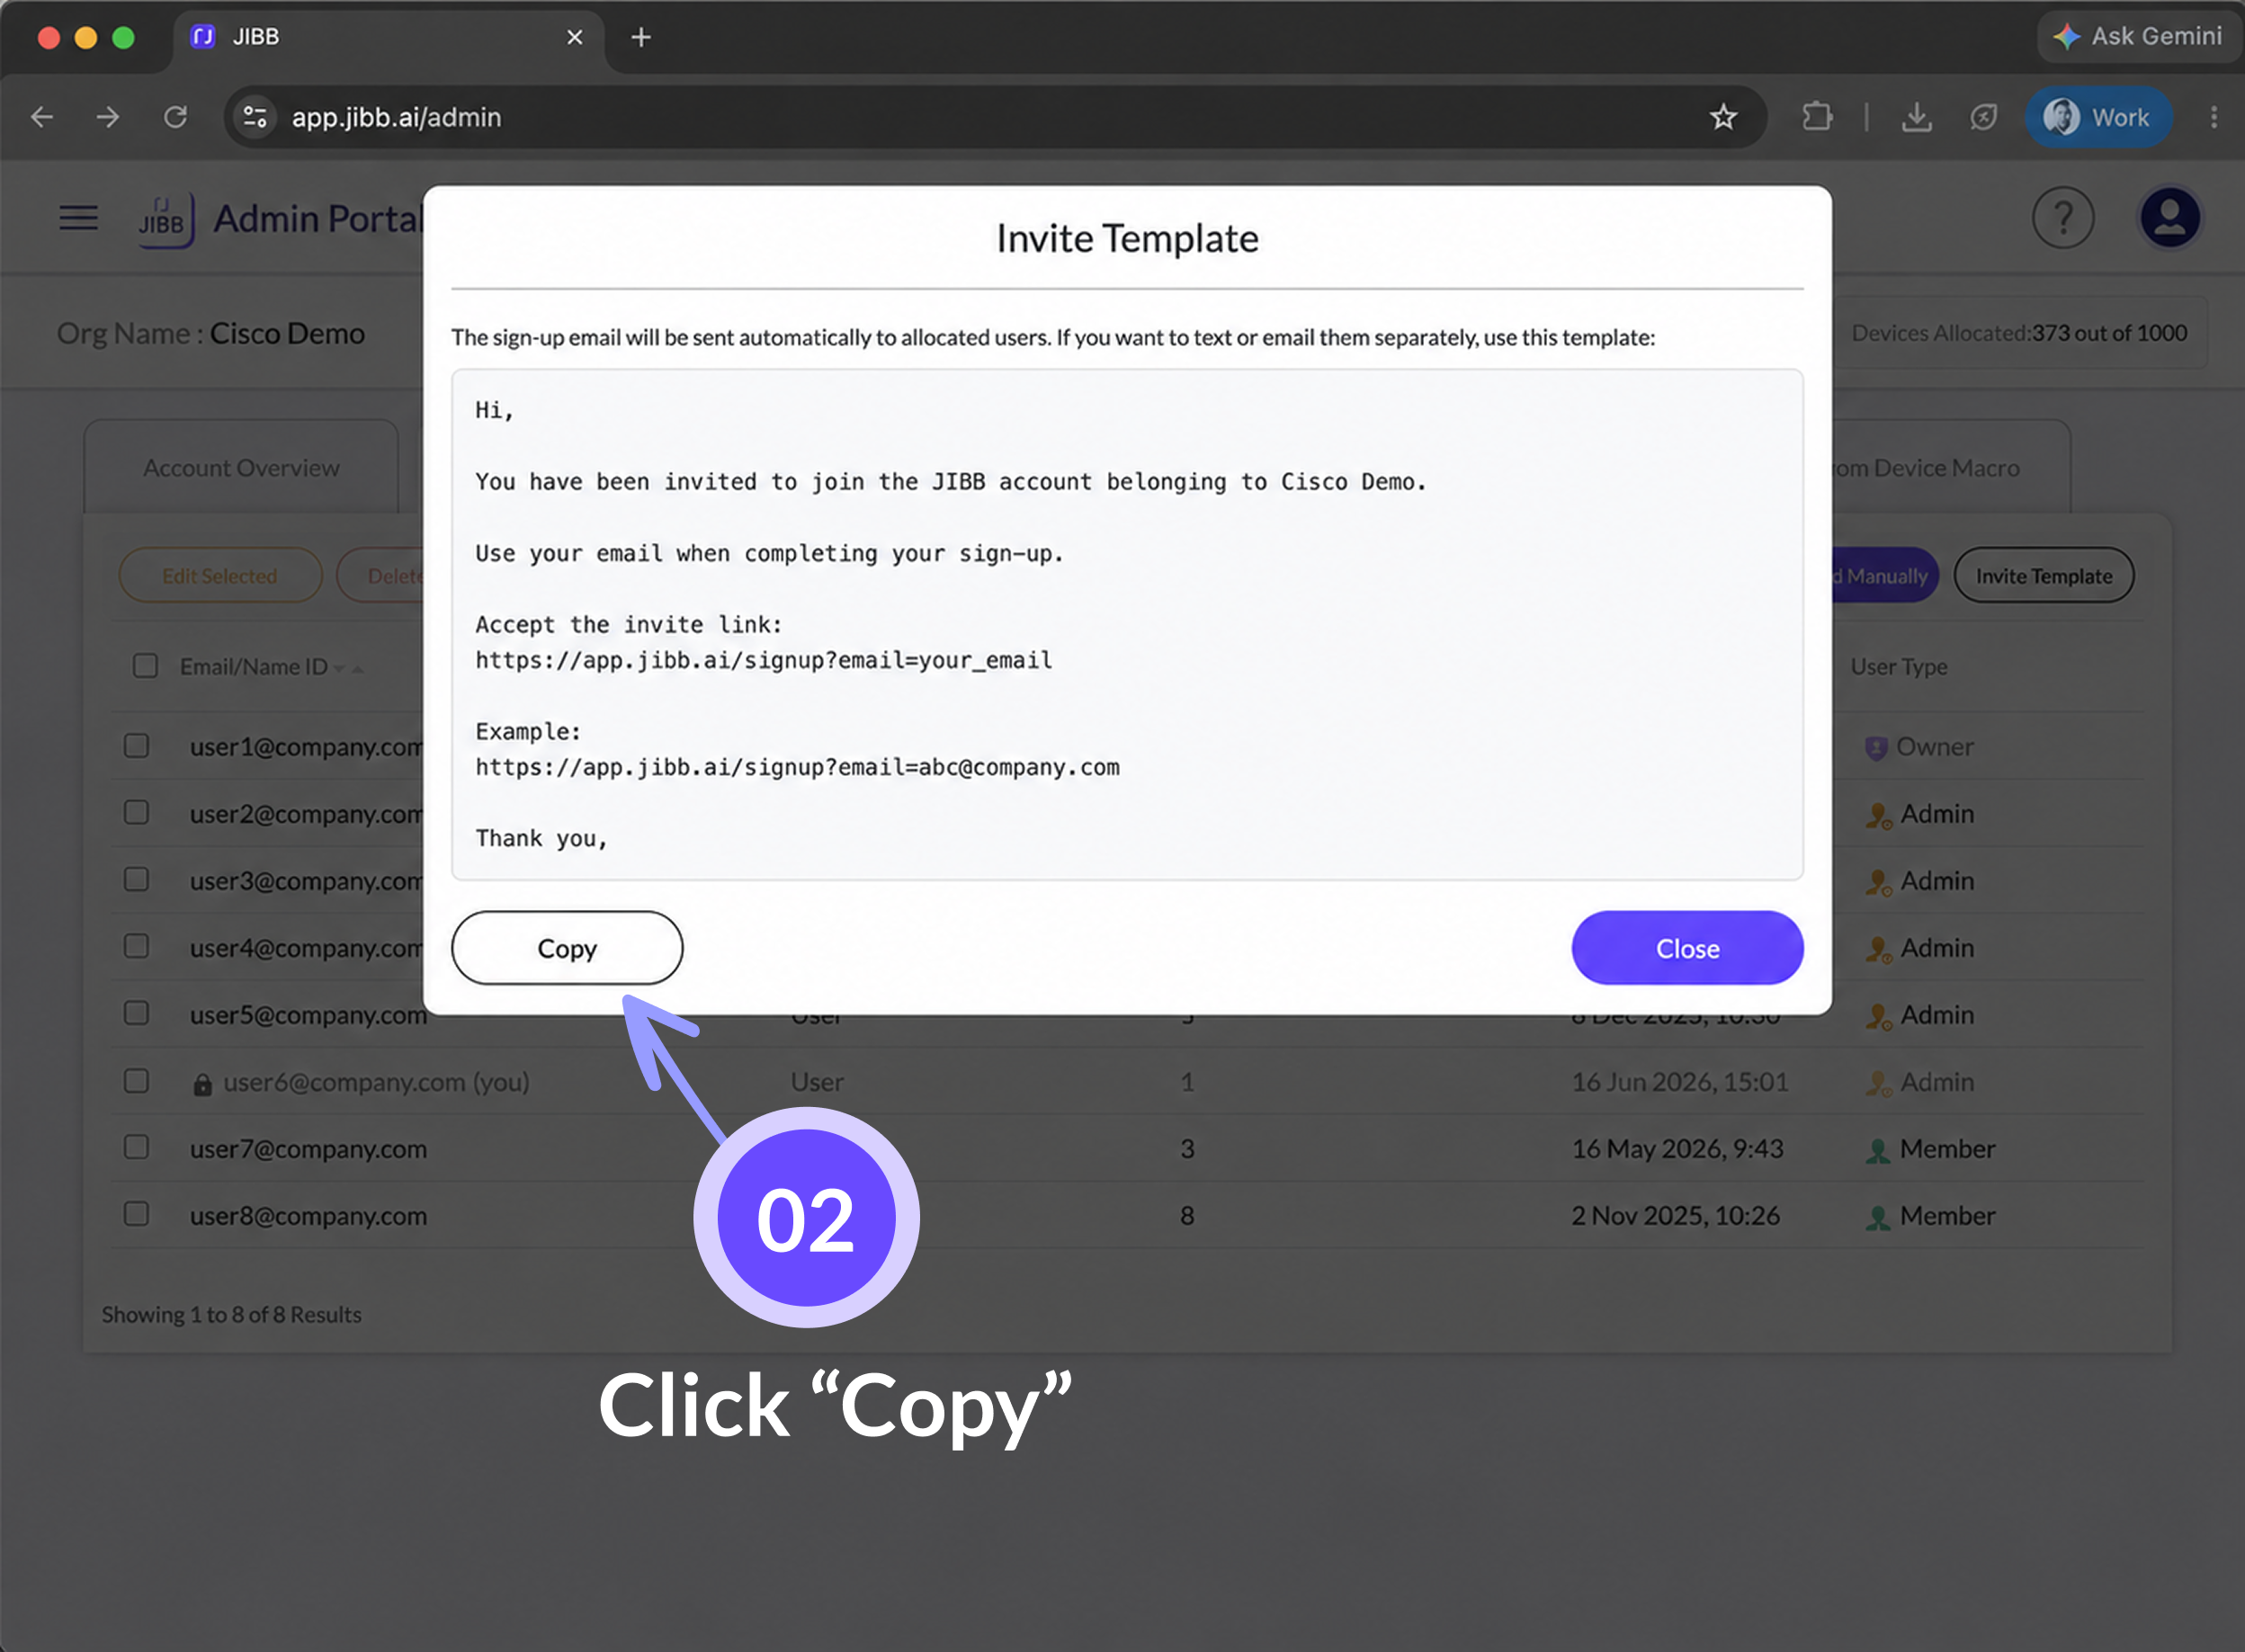
You will need to put your email at the end of the invite link. For example:
- Admin/owner email: admin1@company.com
- Invite template: https://app.jibb.ai/signup?email=admin1@company.com
3. Editing/Removing Users
You have the option to edit user roles or remove users from your account.
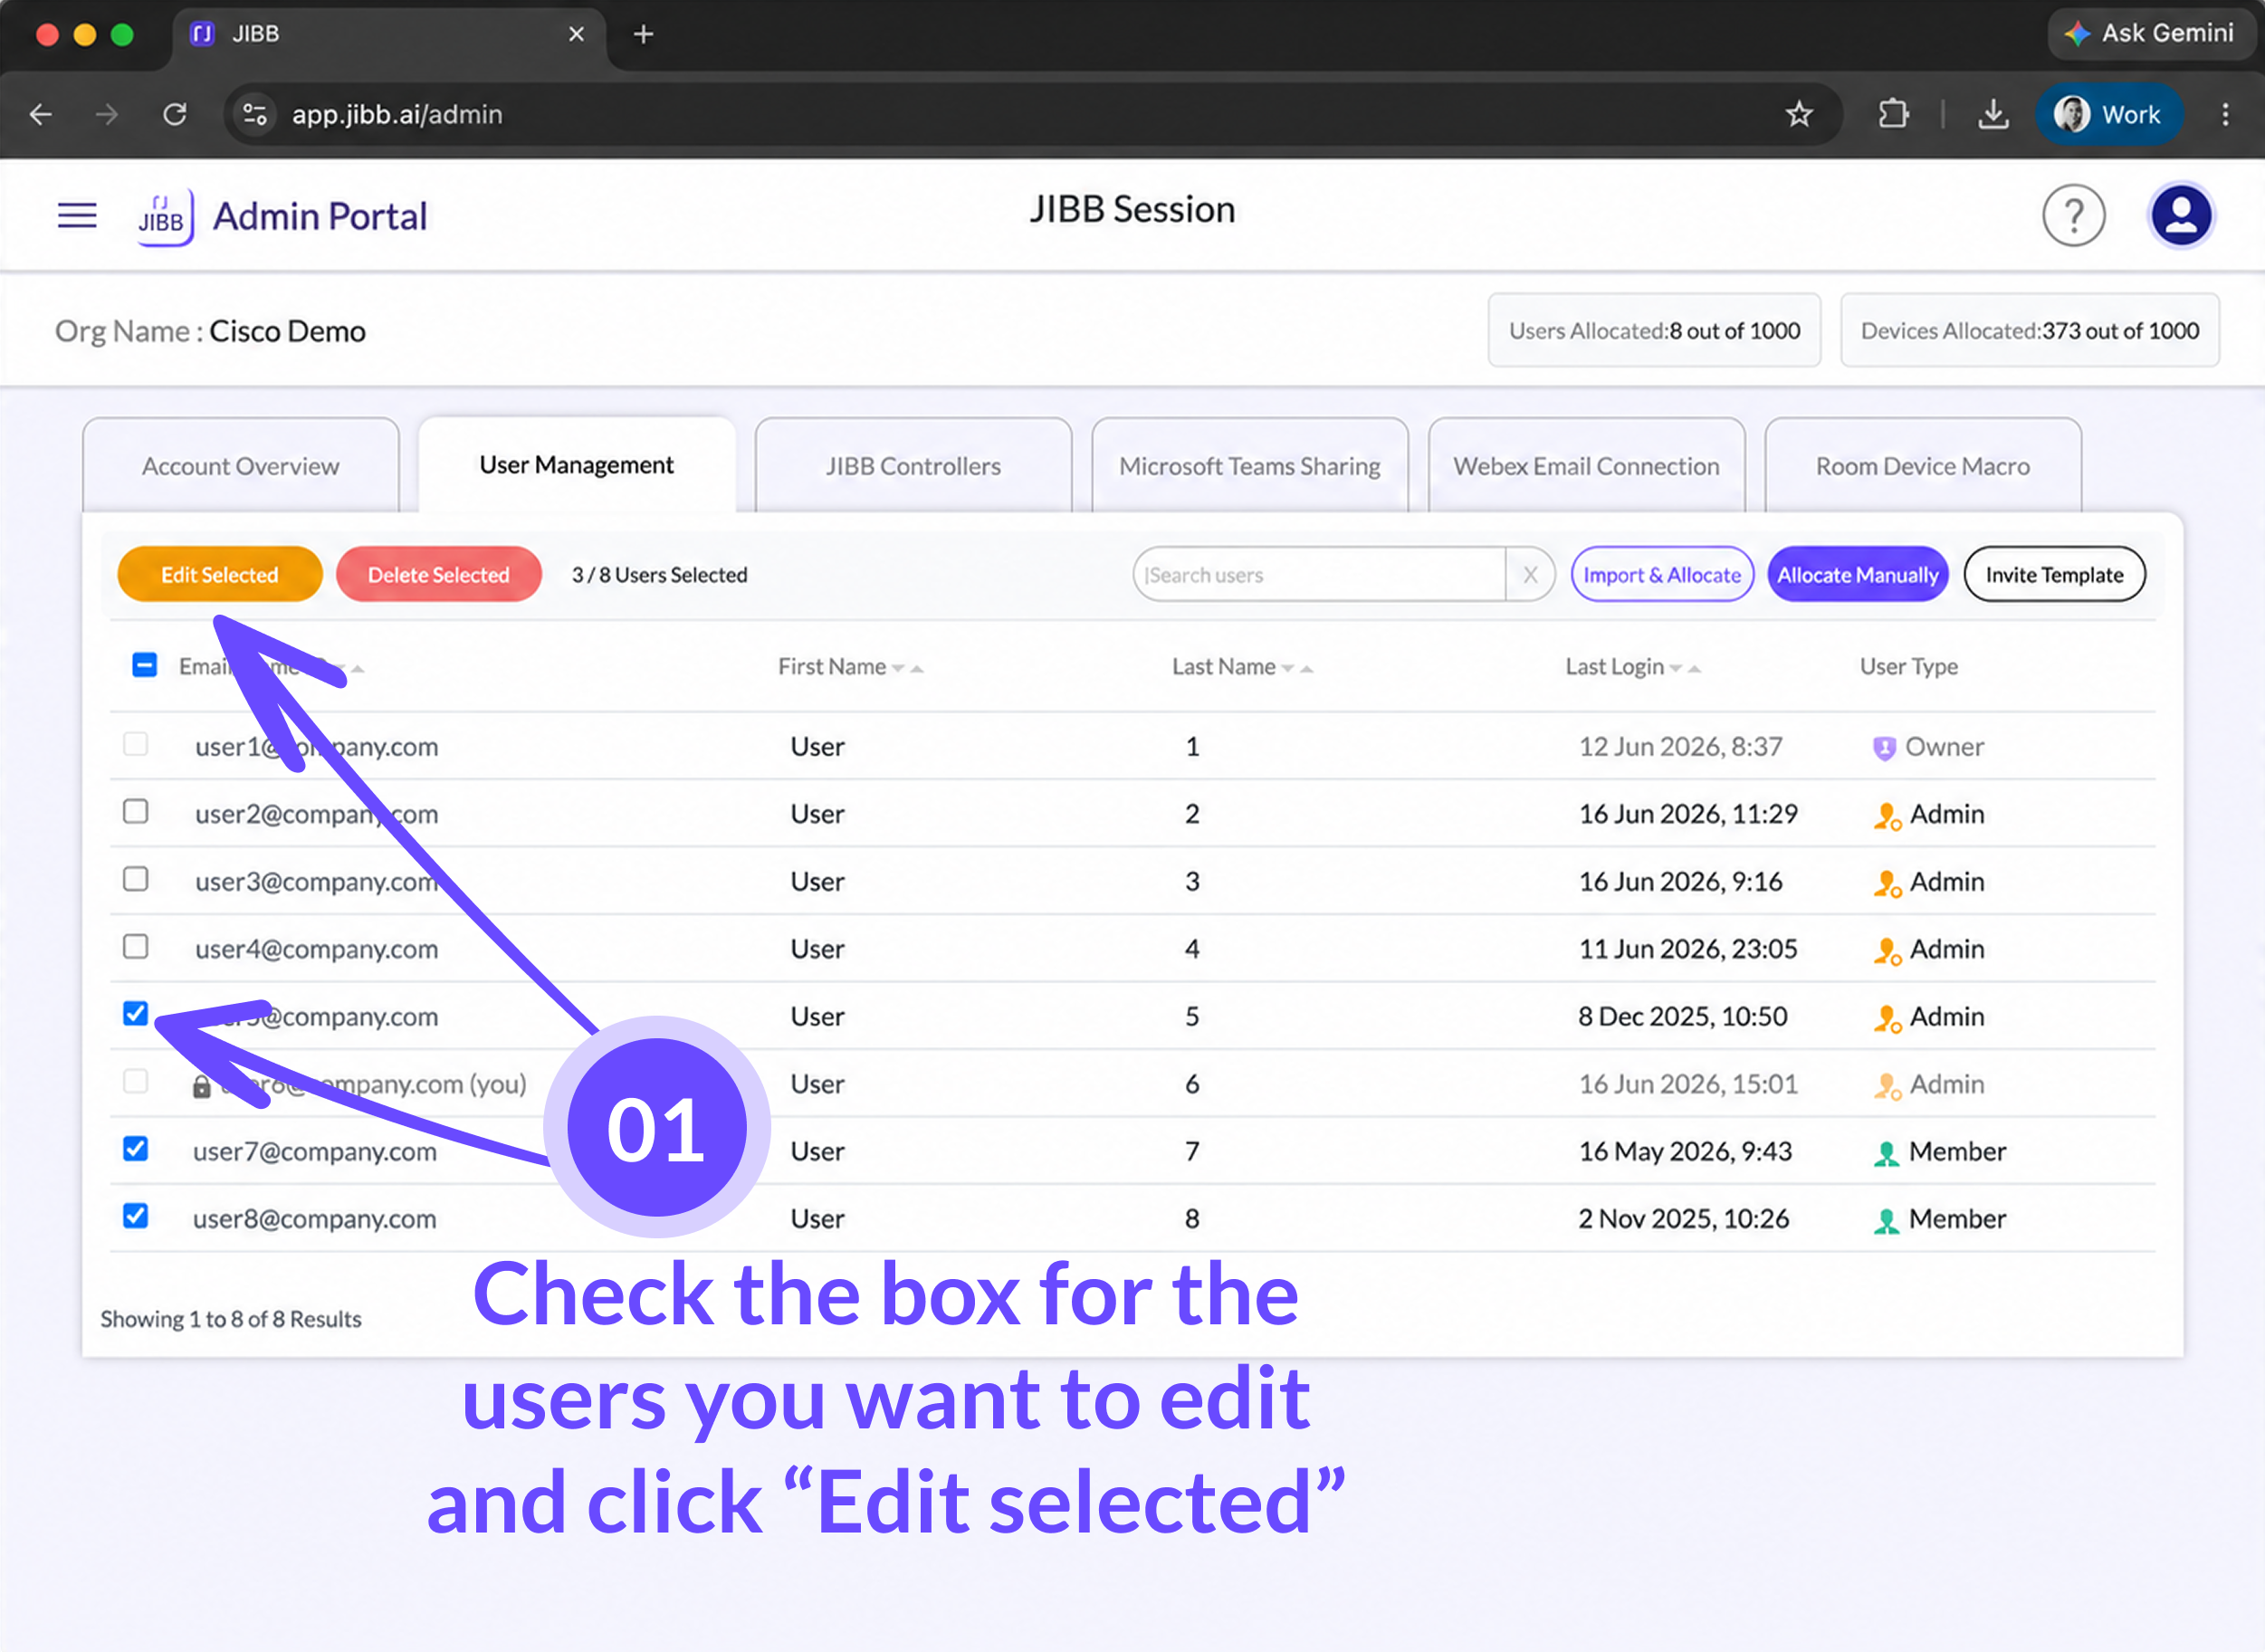
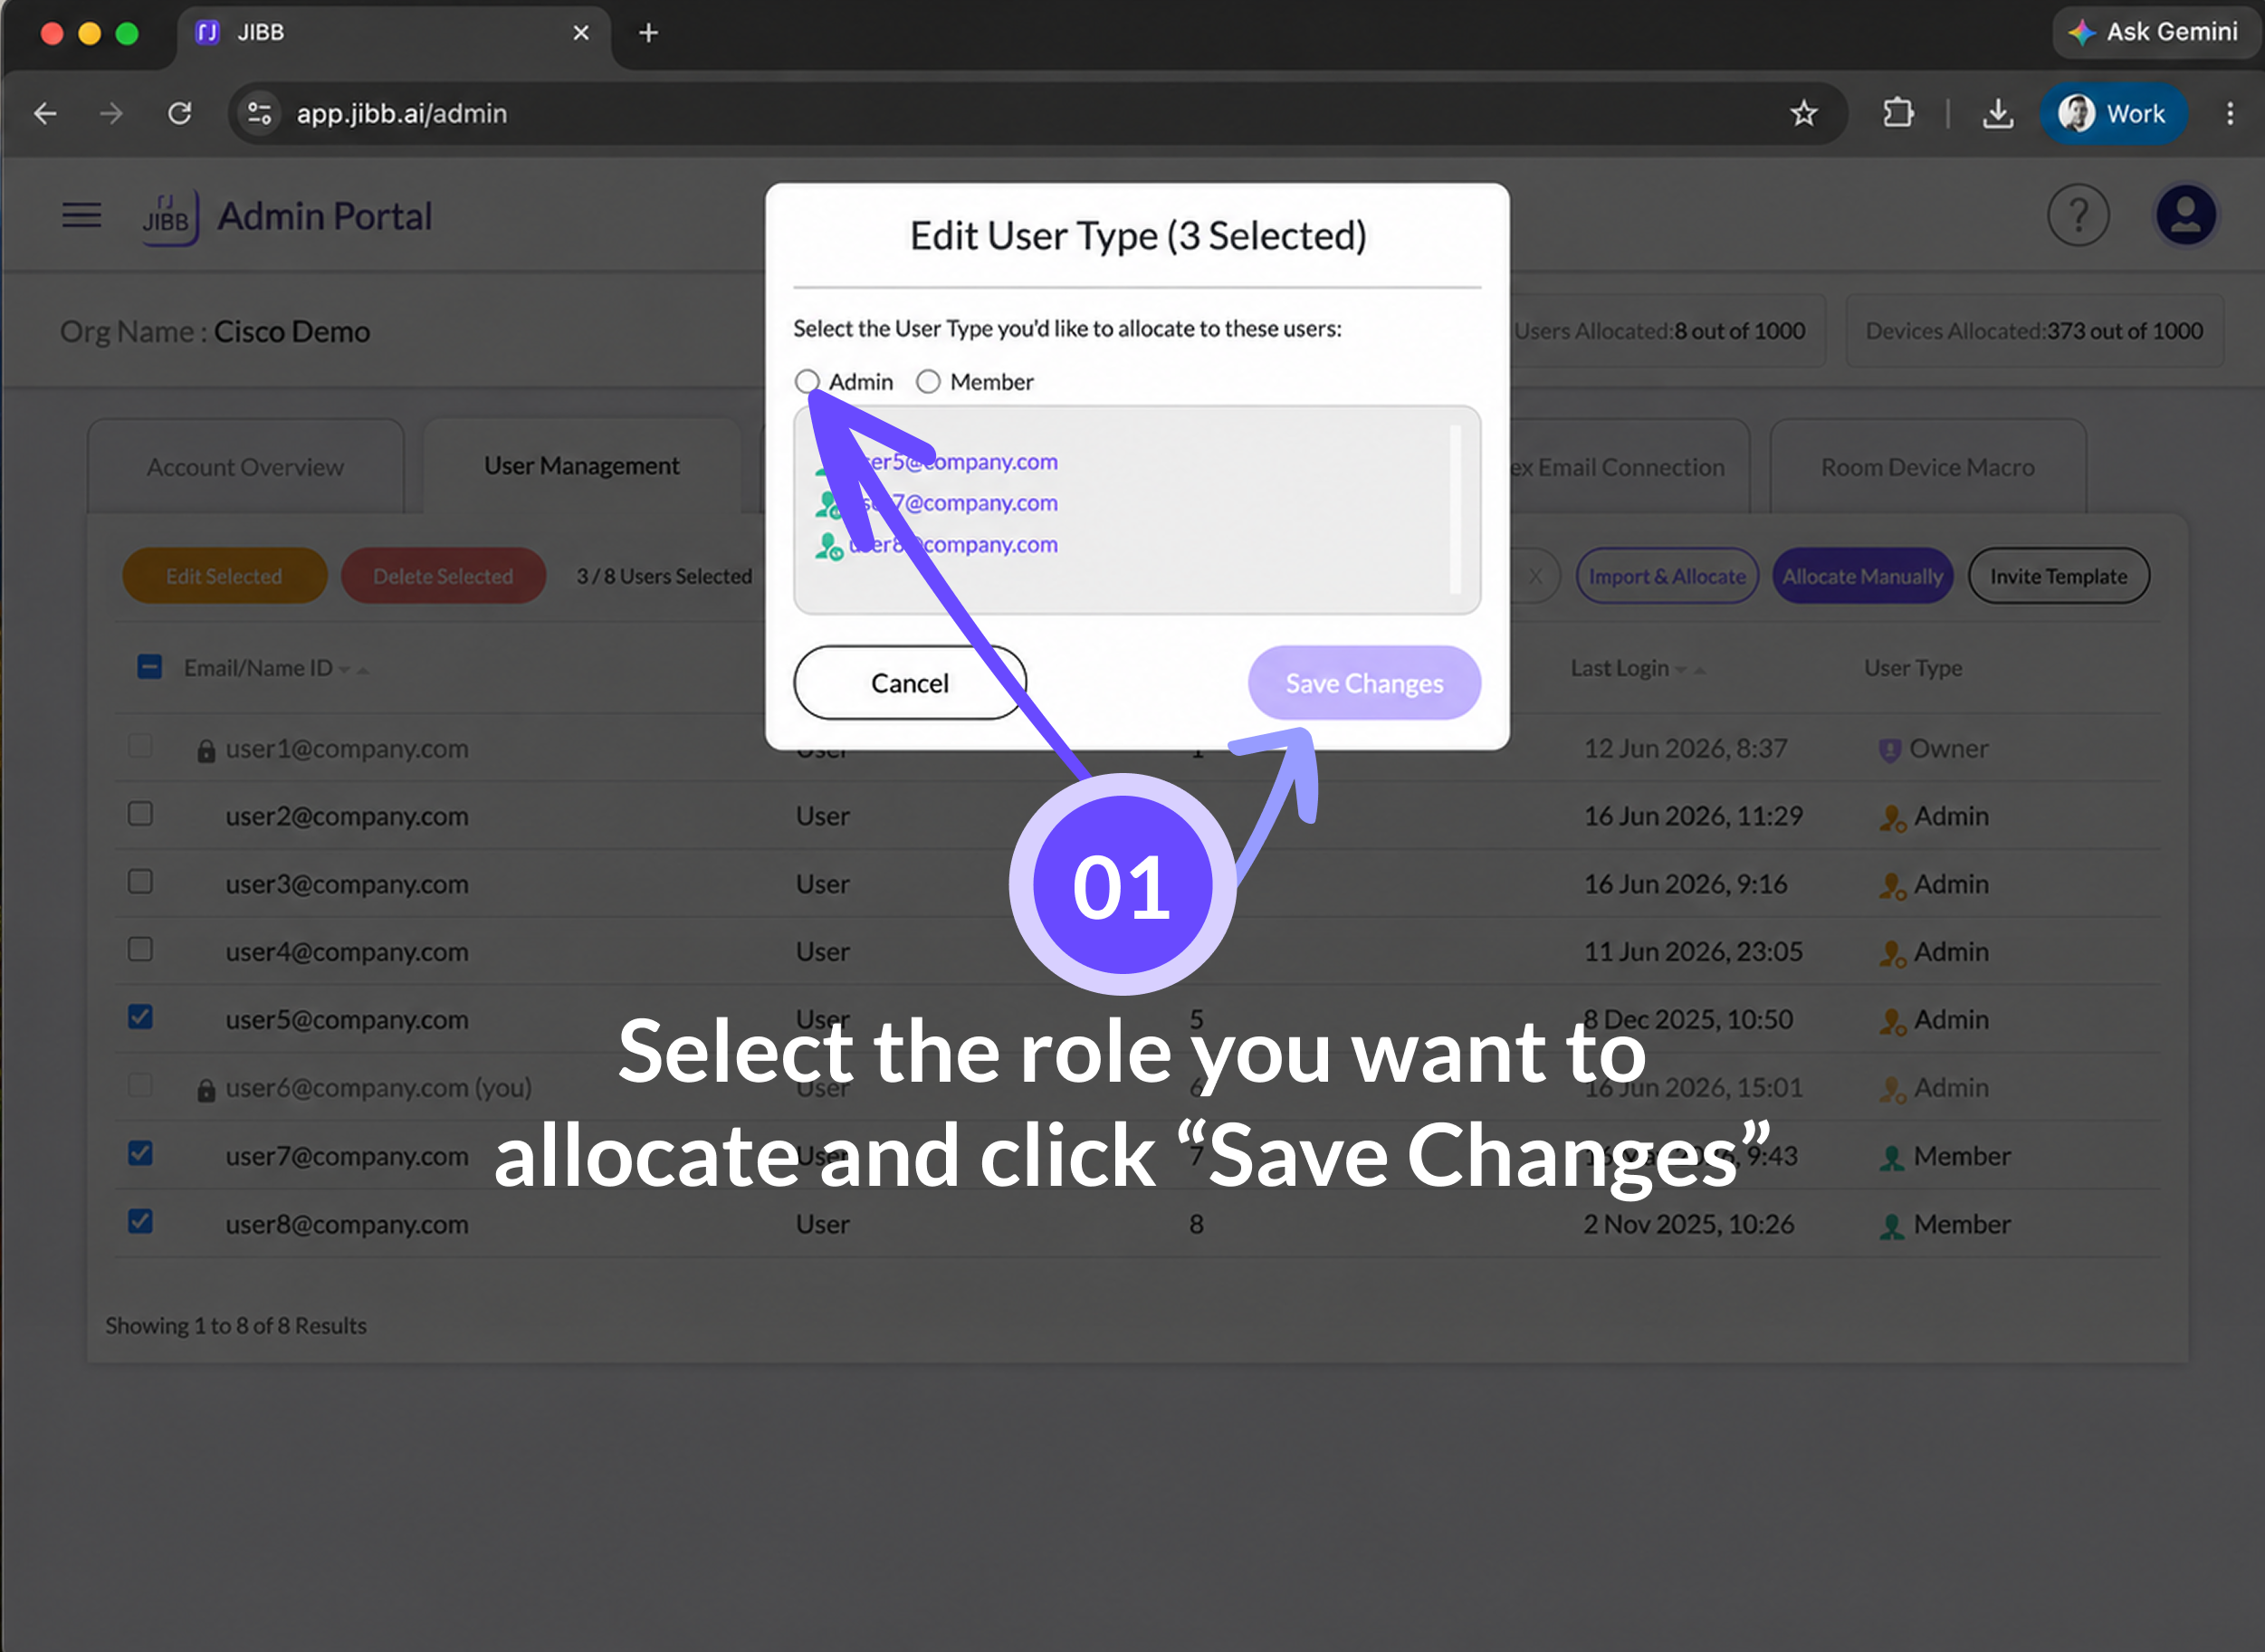
3.1 - Editing User Roles
If you want to edit a user’s role/type at any time, select the user or multiple users via the checkboxes on the left-hand side of the table, then click on “Edit Selected”. Using the pop-up window, select the user role/type you'd like to change the user to and click “Save Changes”.
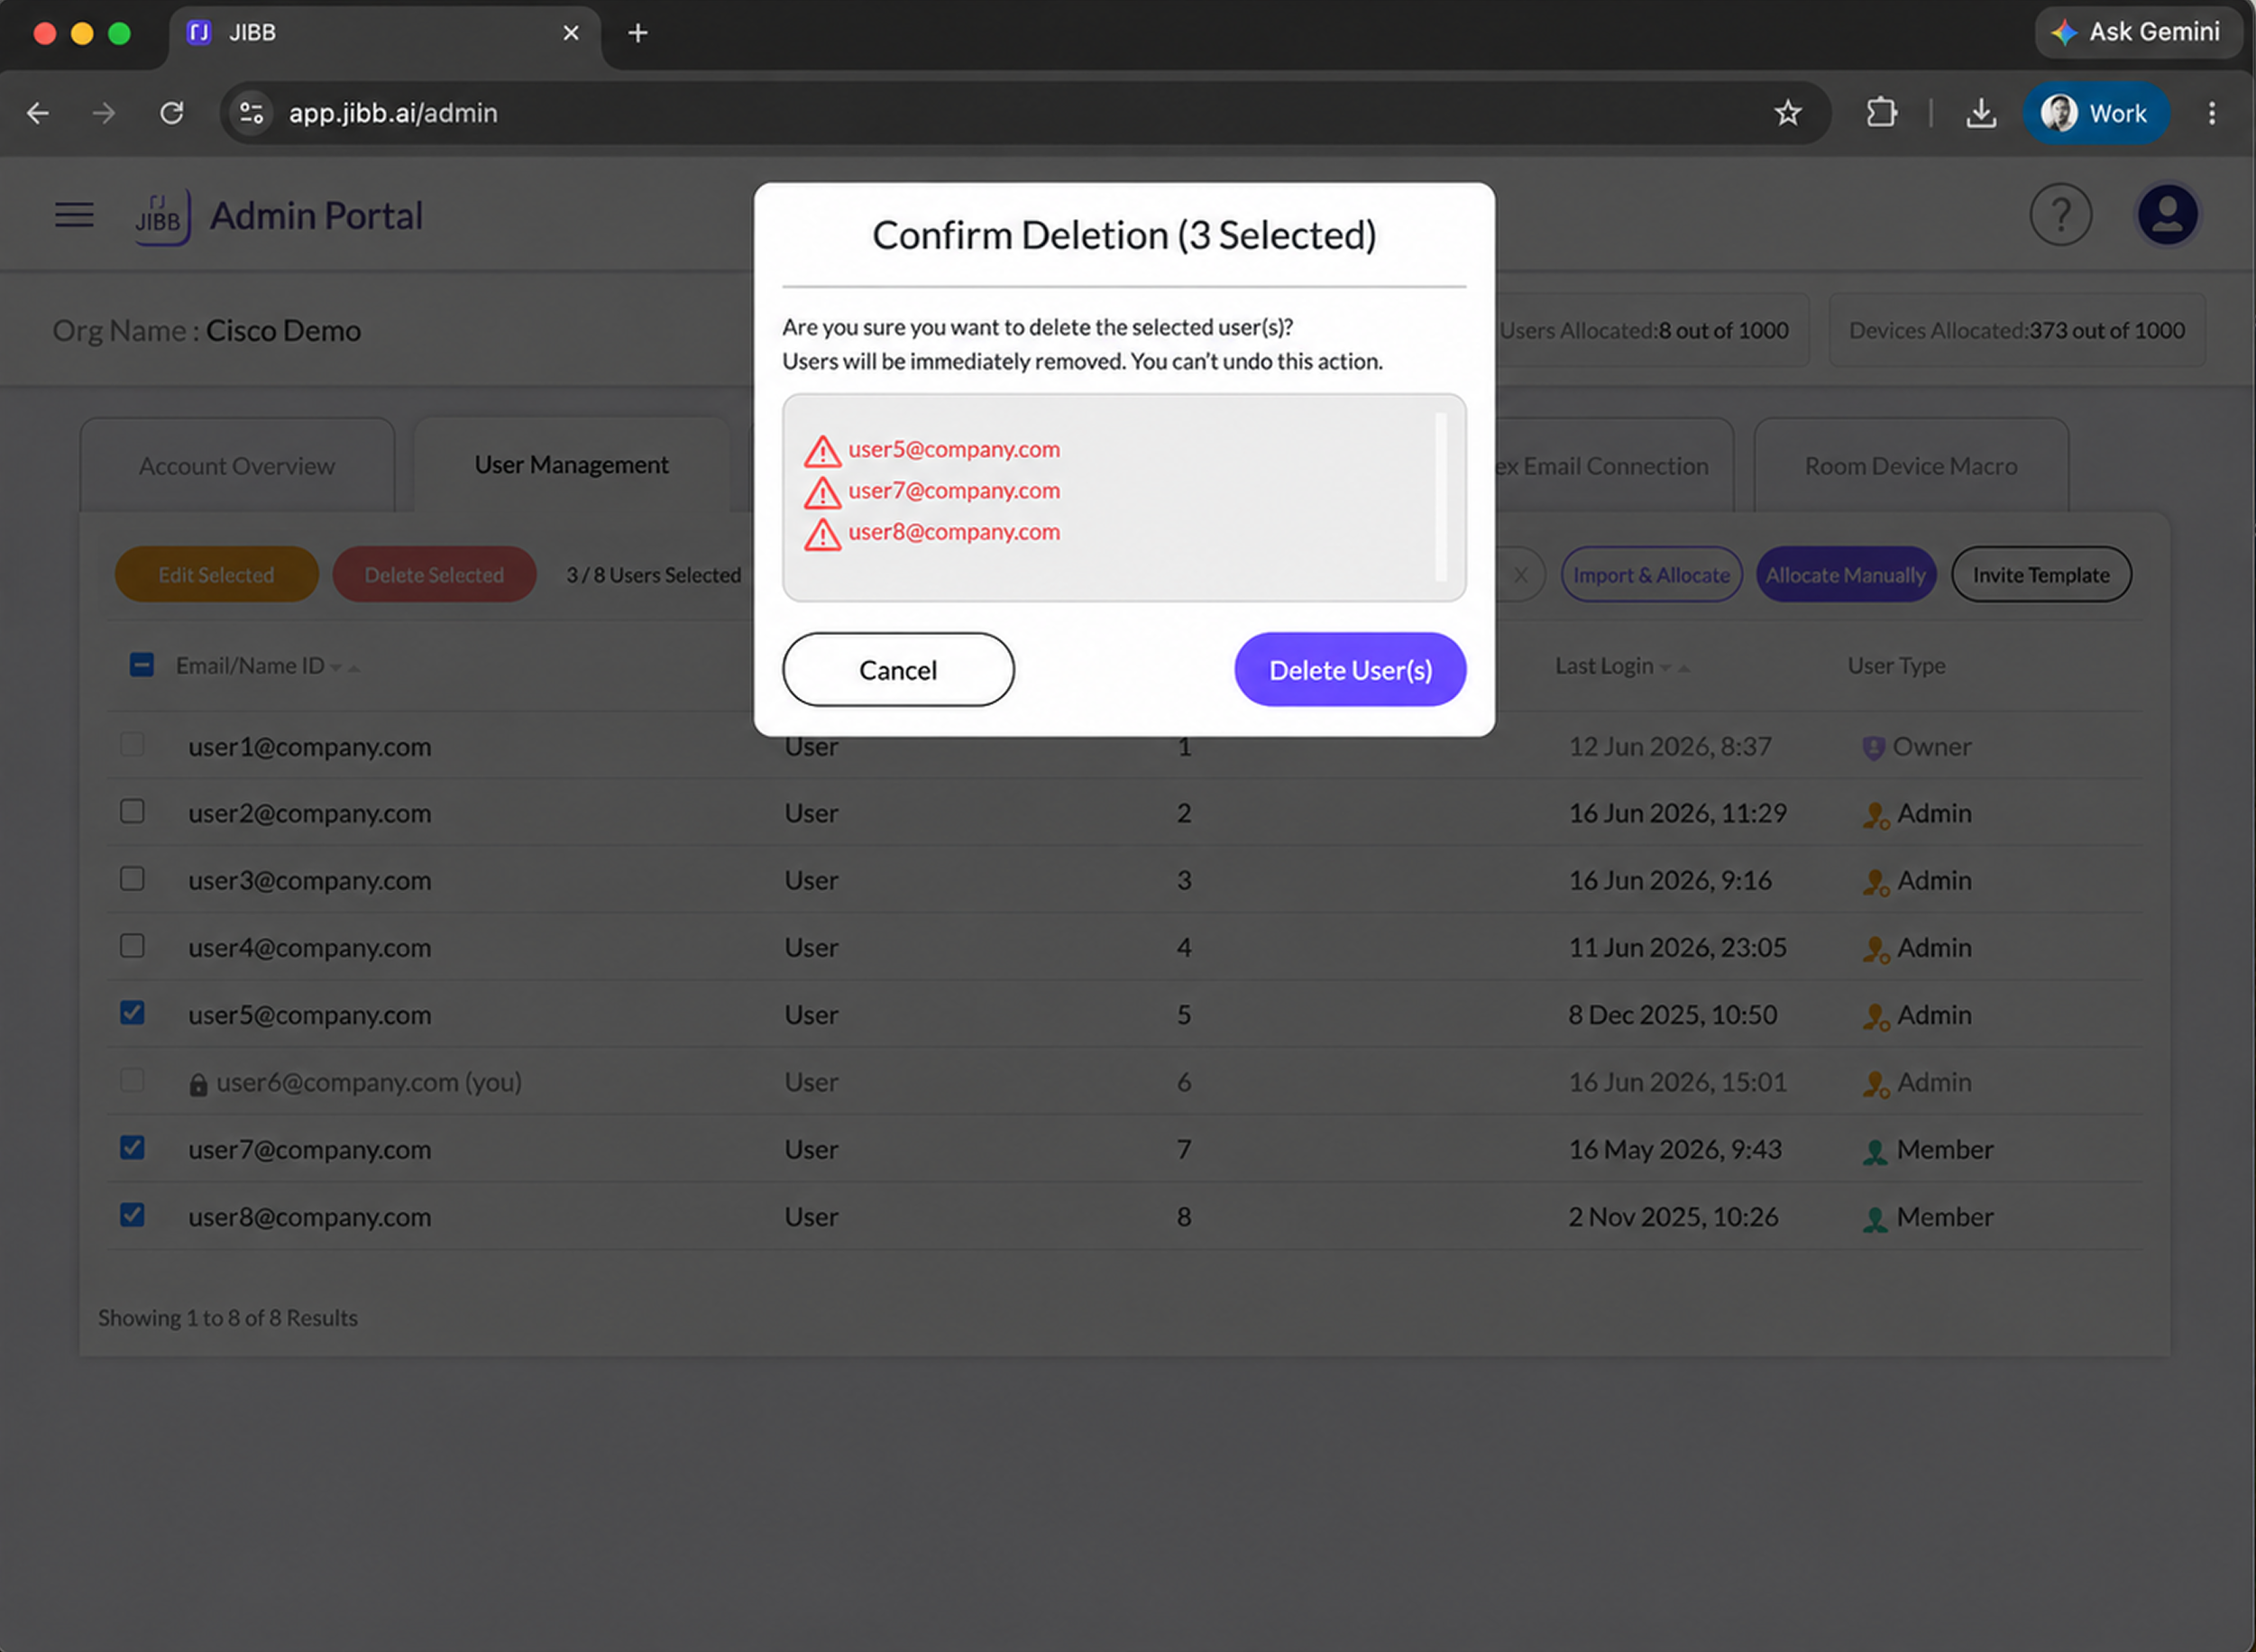
3.2 - Deleting Users
If at any time you want to remove a user from your account, you can select the user, or multiple users via the checkboxes on the left-hand side of the table, then click on the red "Delete Selected" button, then click confirm. The user(s) will be removed from your account.
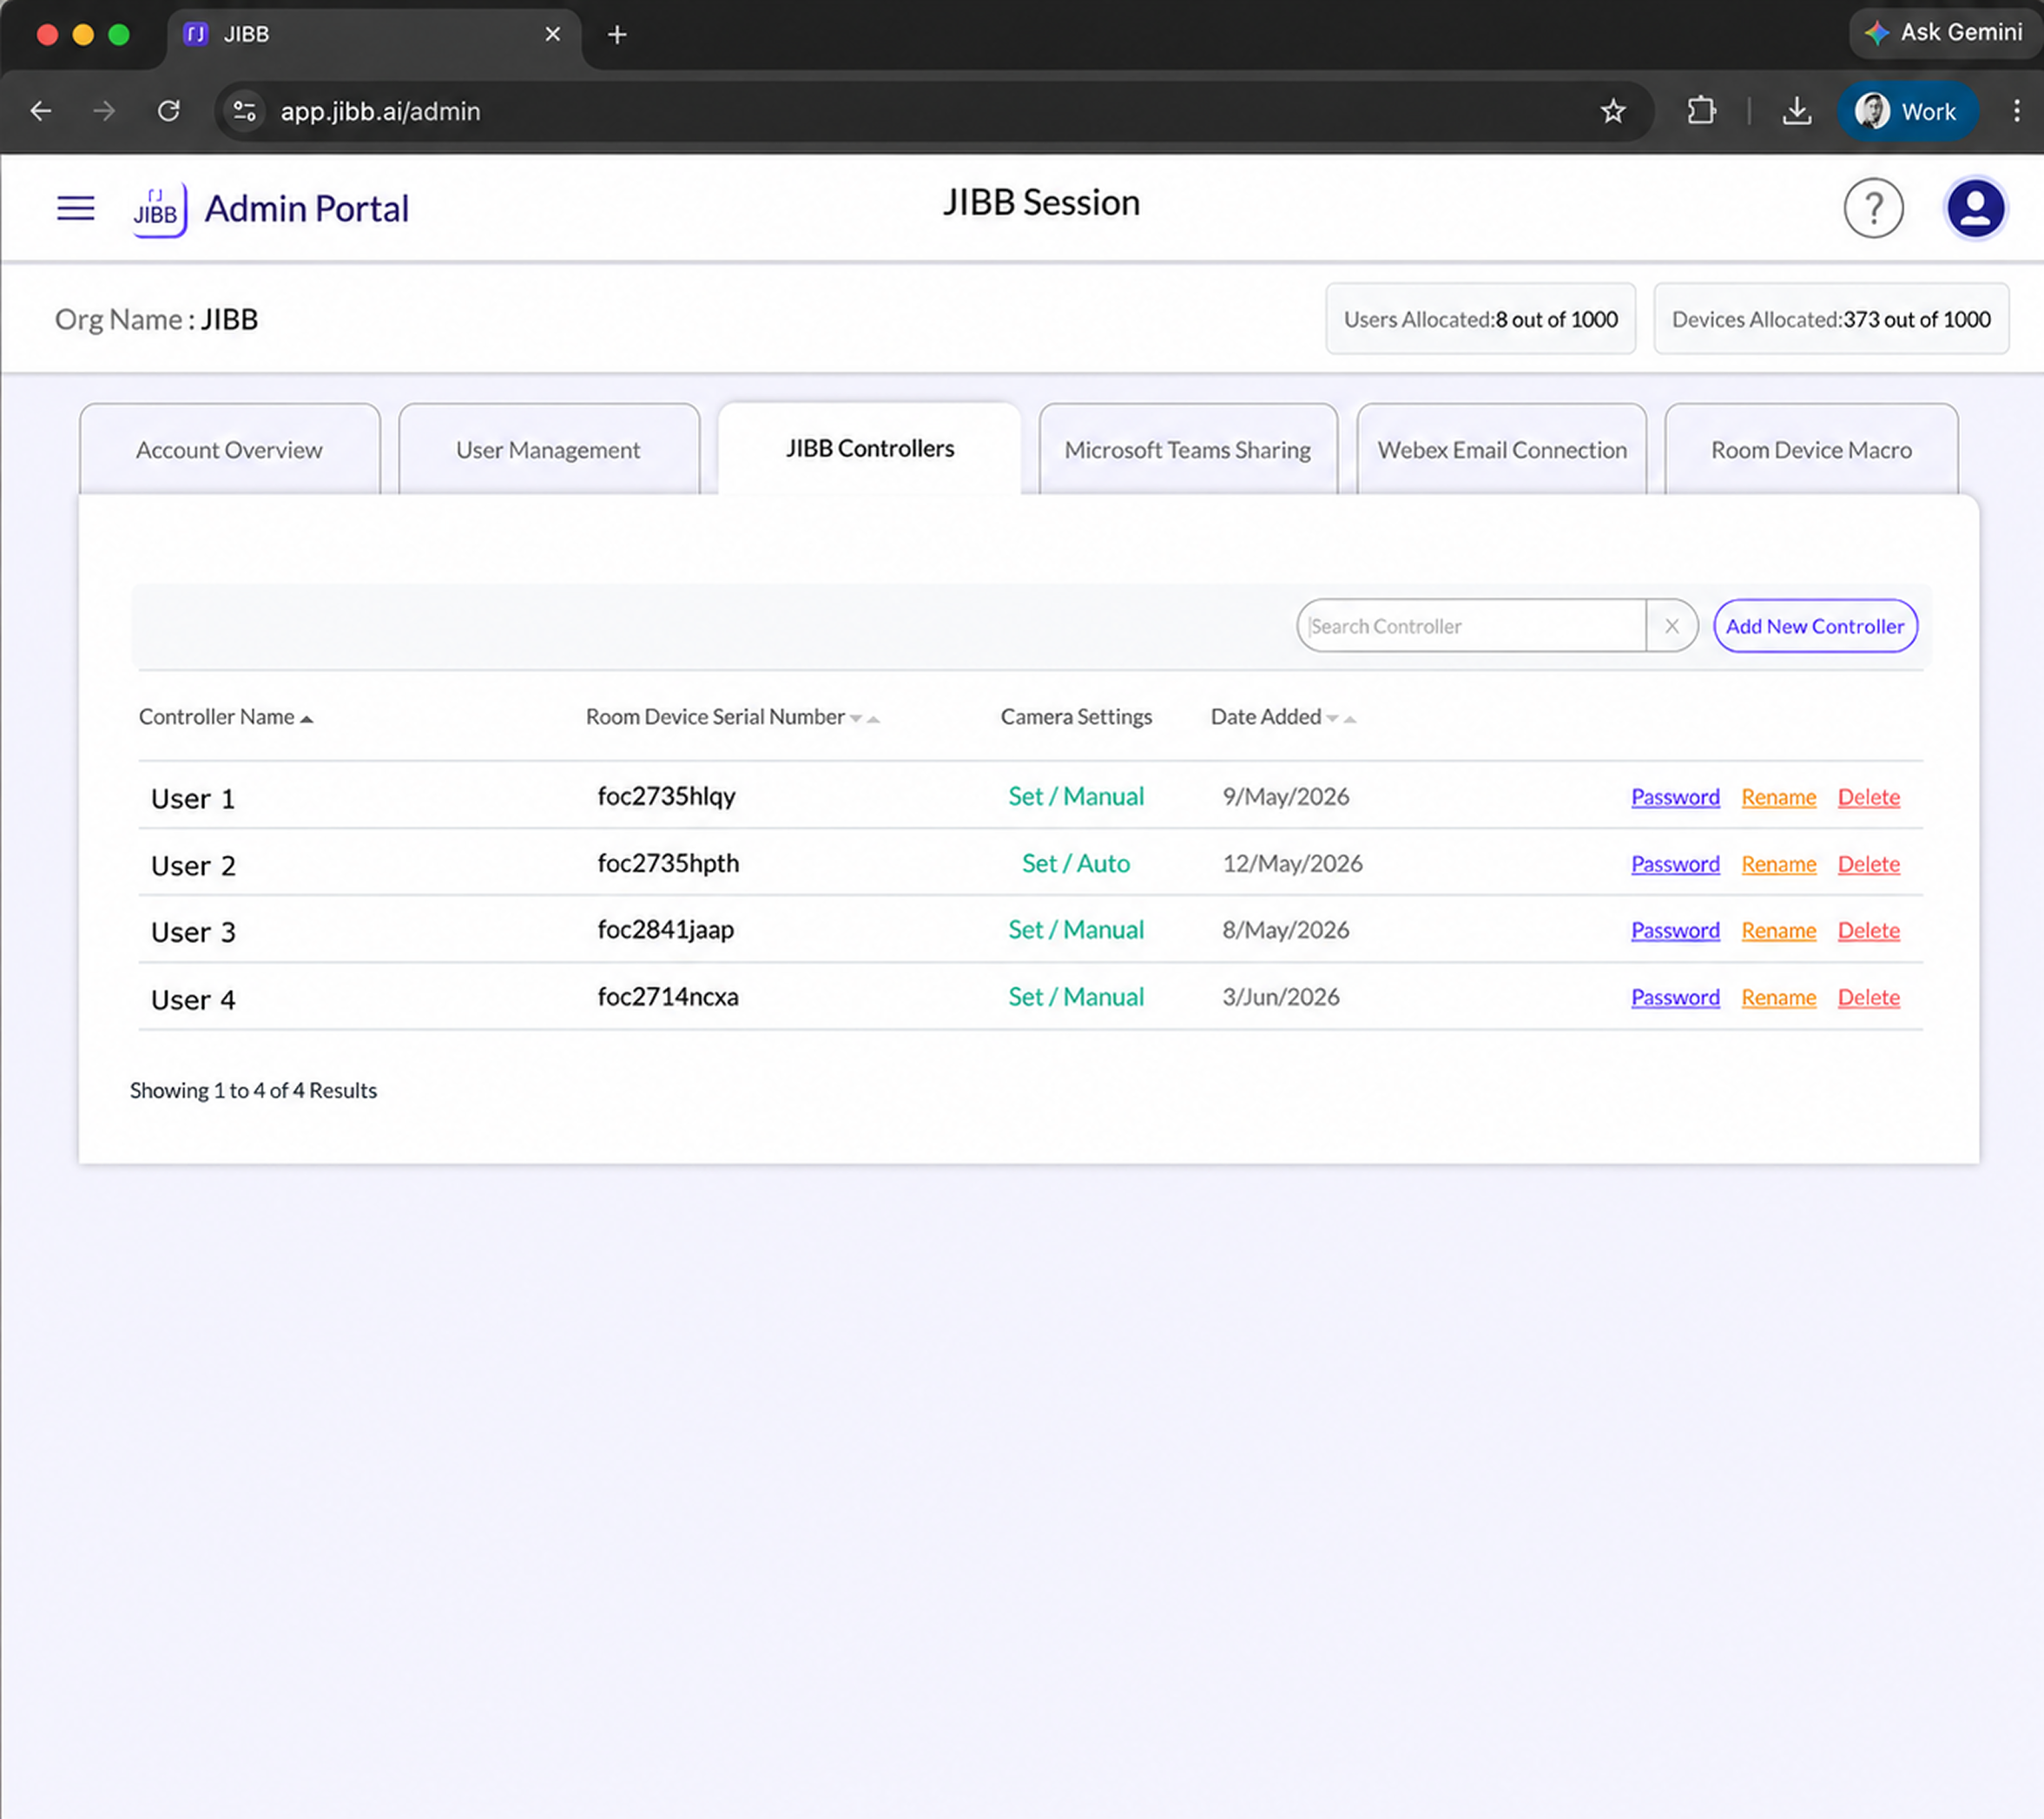
4. JIBB Controllers
This tab allows you to manage the licences and passwords of your JIBB controllers.
From the JIBB Controllers tab you can add new controllers, rename them, reset passwords, and remove controllers from your account. A full JIBB controller guide with all the details is coming soon.
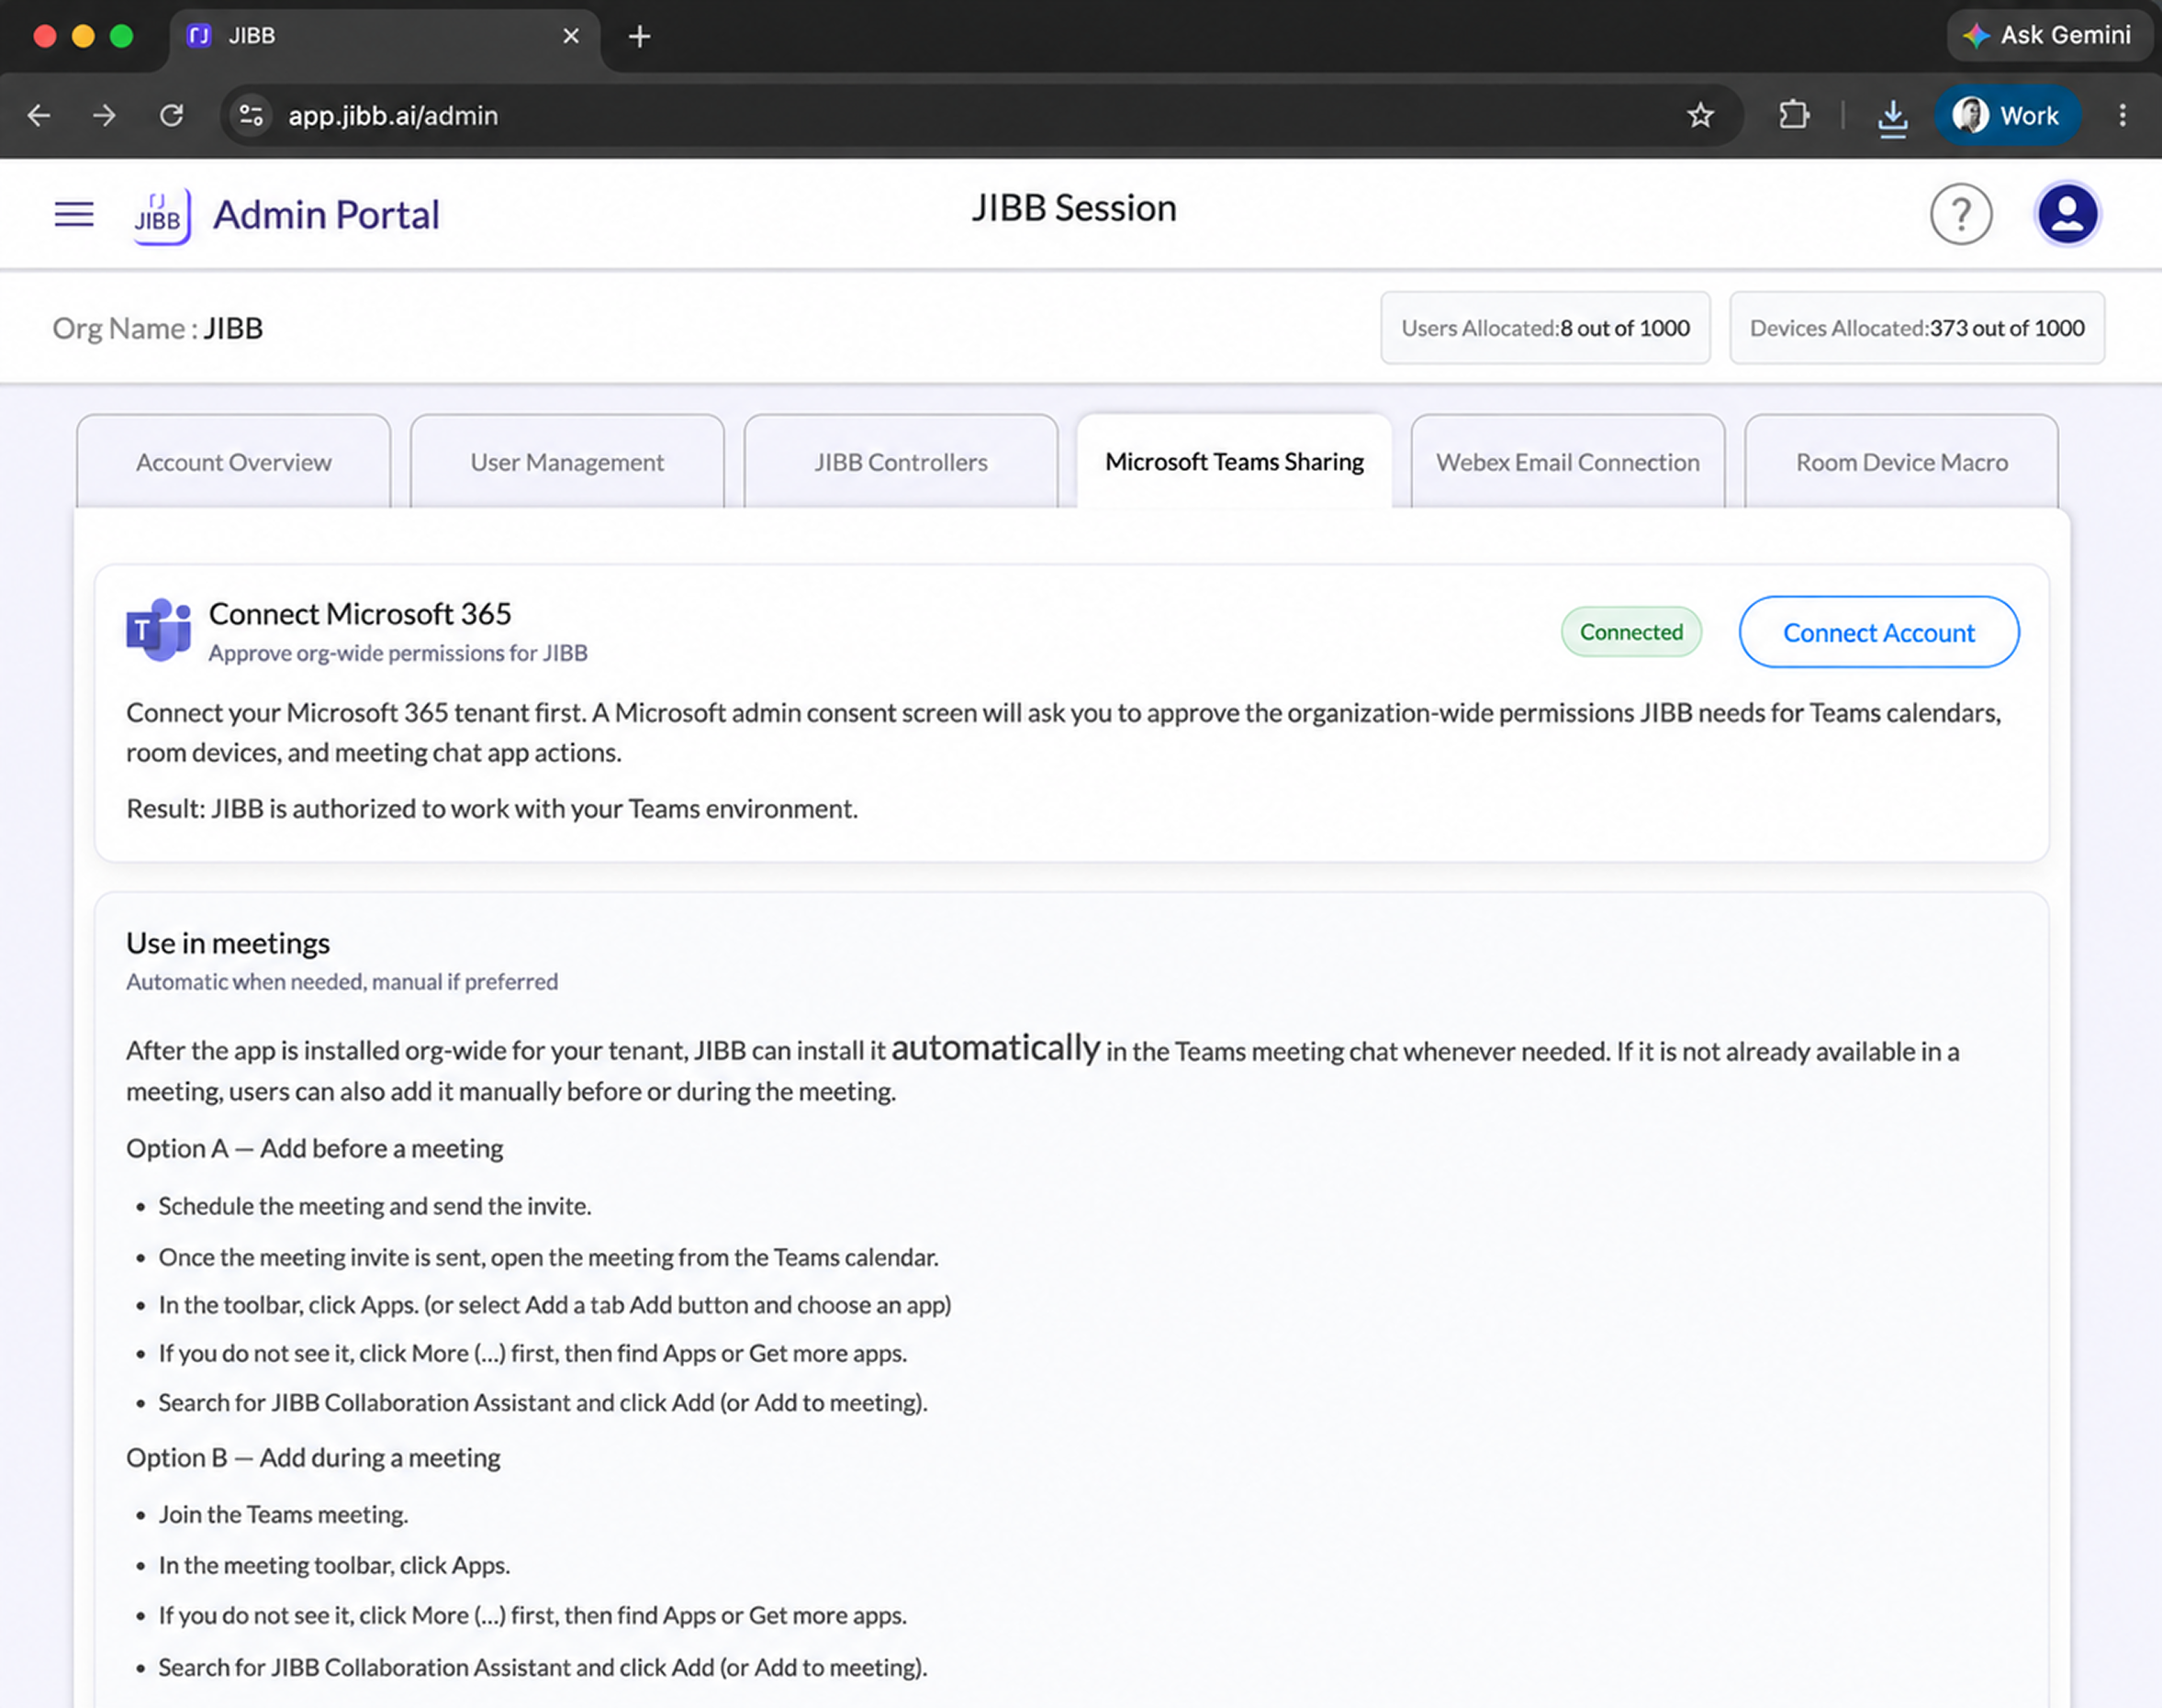
5. Microsoft Teams Sharing
Connect your Microsoft 365 tenant to JIBB to enable the Collaboration Assistant for devices on MTR.
For full details on connecting Microsoft Teams, see section 5 of the How to Install JIBB Room on a Cisco Device (MTR Mode) guide.
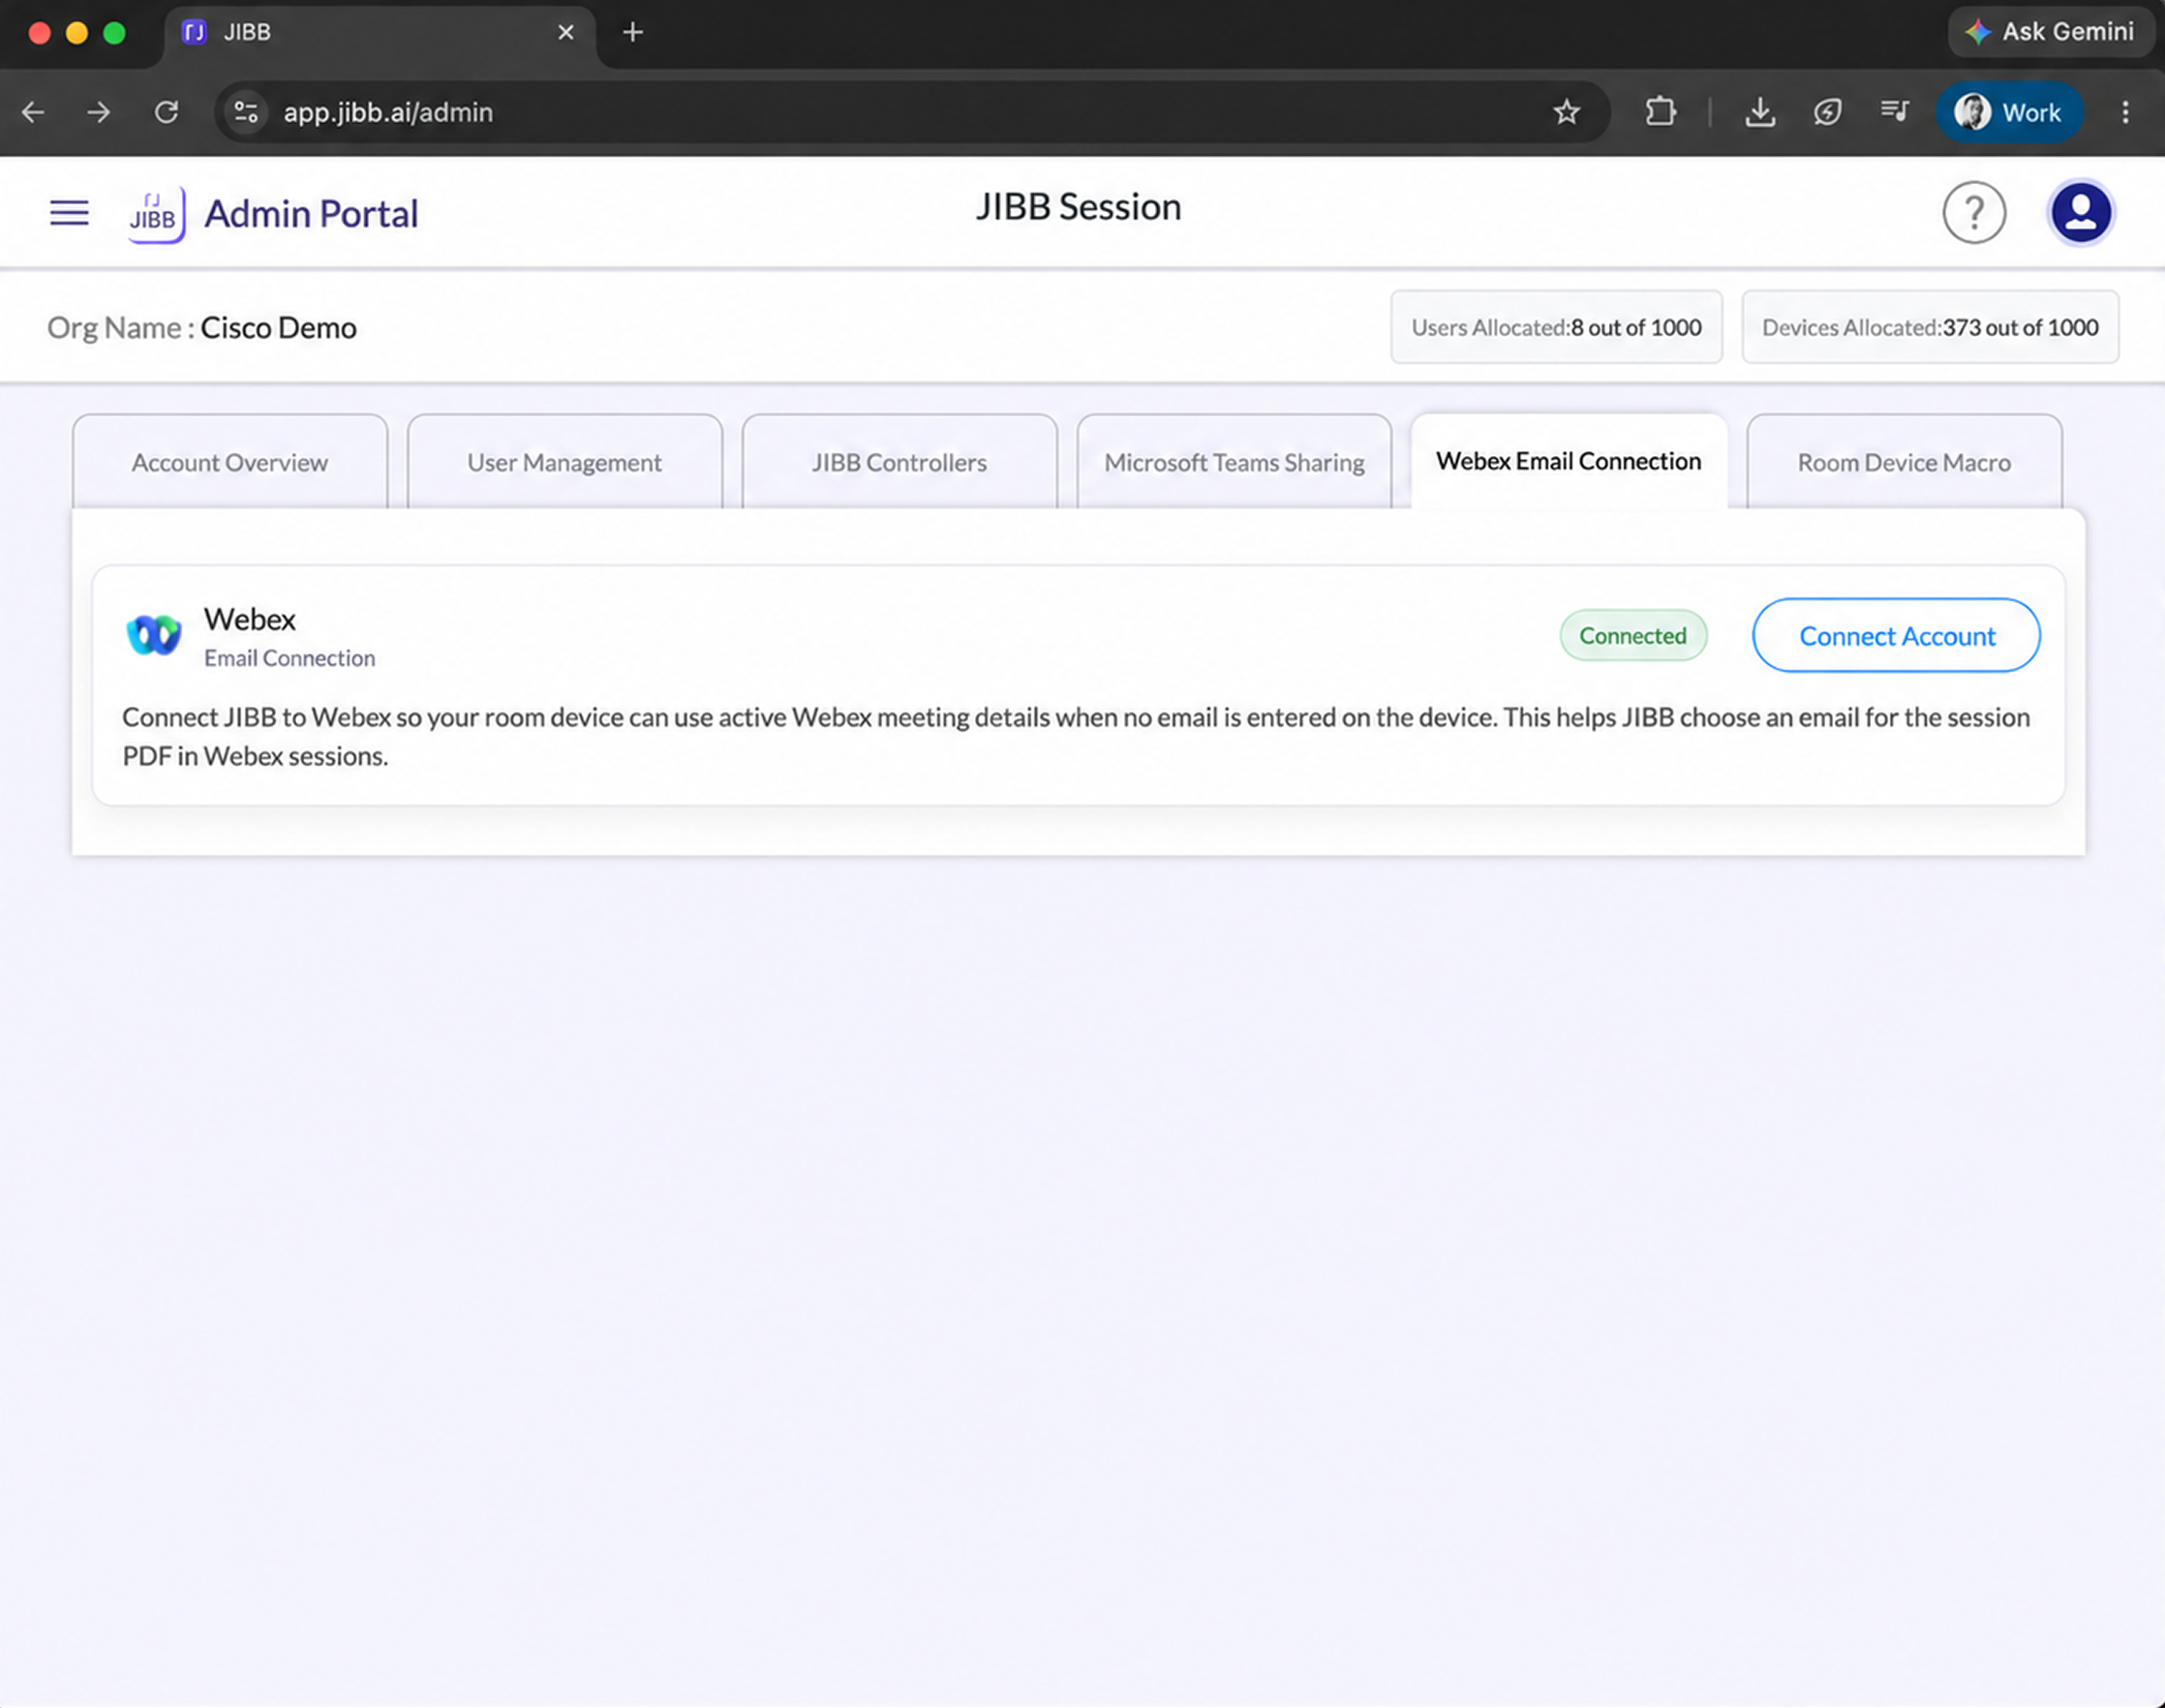
6. Webex Email Connection
Connect JIBB to Webex so your room device can use active Webex meeting details when no email is entered on the device.
For full details on the Webex email connection, see section 5 of the How to Install JIBB Room on a Cisco Device (Room OS) guide.
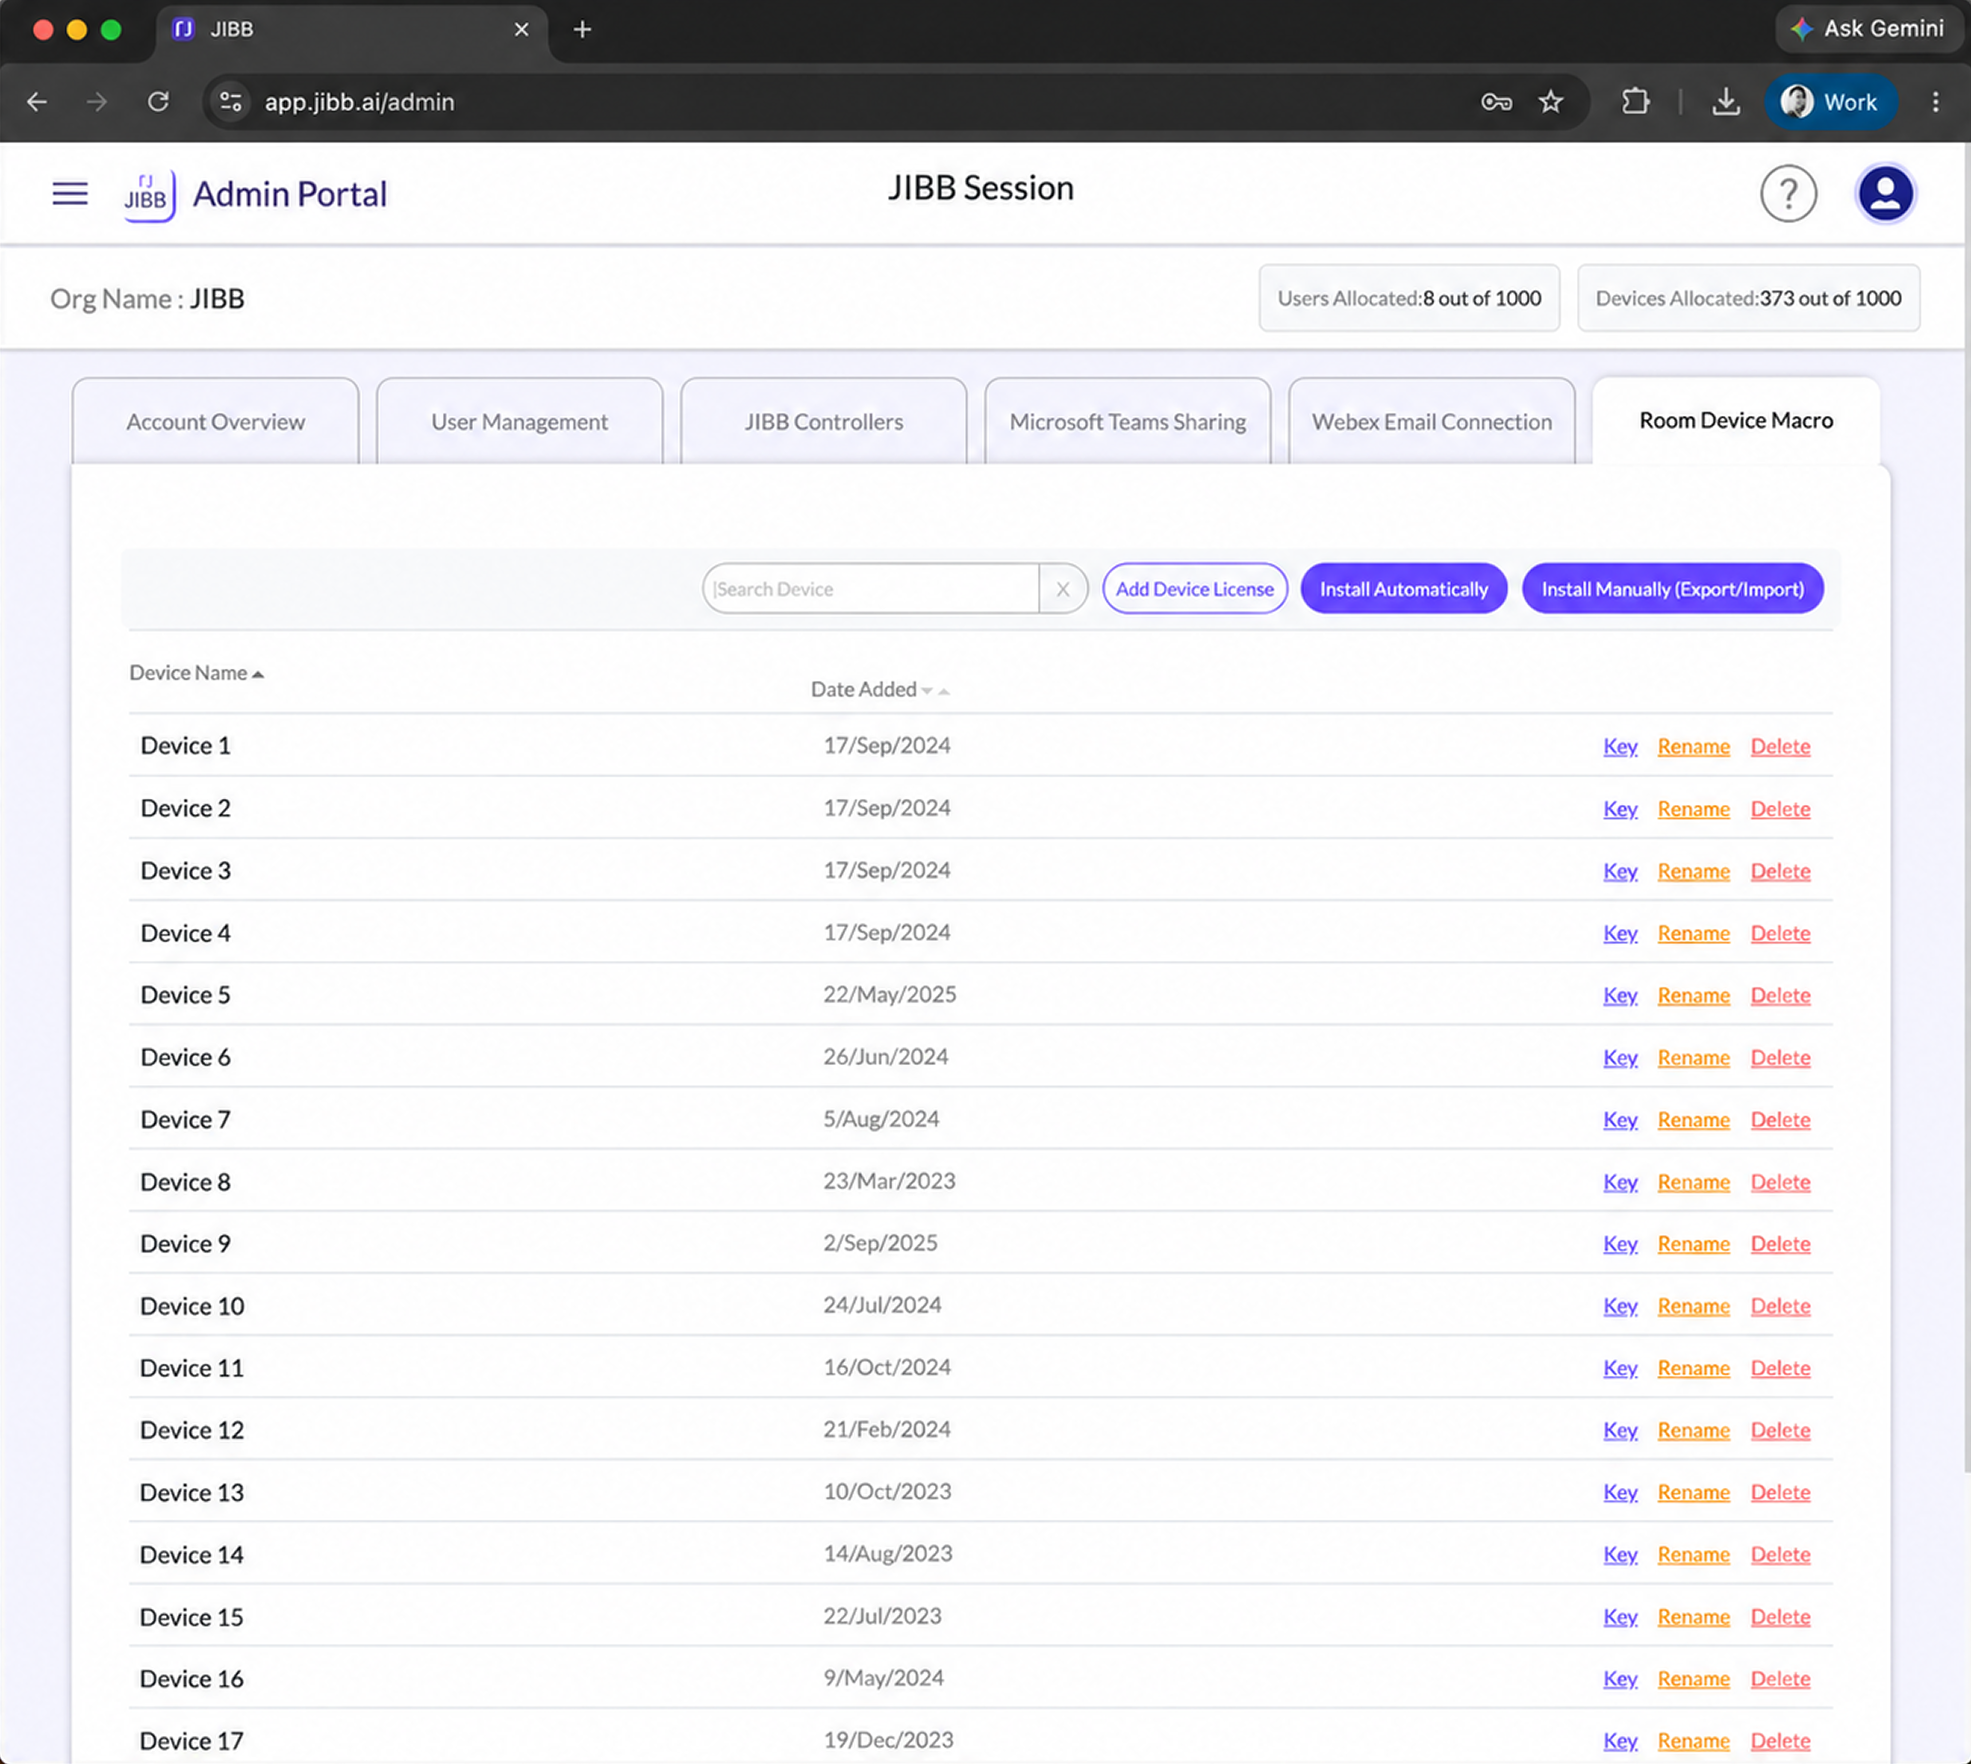
7. Room Device Macro
Here you can allocate your JIBB licenses and install the JIBB Macro on your device.
For full details on installing the macro, see section 2 of either the Room OS or MTR installation guides.
Still Need Help?
If you didn’t find the answer here or need help with something more specific, our support team is ready to assist. Use the options below to get personal support or raise an issue.