Check Your Network Setup for using JIBB
As a crucial first step, this guide is designed to ensure that your enterprise’s network environment is optimized for seamless integration with JIBB Room. By following these proactive verification steps, you will confirm that all necessary conditions are met for a successful installation.
We appreciate your diligence in preparing your network settings to facilitate a smooth and effective integration of JIBB’s services. Let’s start by ensuring that your system is perfectly aligned with JIBB Room’s operational requirements.

1. Check JIBB Workspace Accessibility
Confirm that your network allows access to JIBB Workspace from a device on the same network as your Cisco Room device.
Visit the Login Page
Open a web browser on a desktop connected to the same network as your Cisco device and go to https://app.jibb.ai/.
- If you see the login page, your network allows access to JIBB. Proceed to Step 2 to confirm full accessibility.
- If you see a blank or error page (for example, "This site can't be reached"), your network settings, such as firewalls or proxies, are likely blocking access. Continue to Step 3.

2. Verify JIBB Room API Accessibility
Use the device's Developer API to confirm that the Cisco Room device itself can reach JIBB.
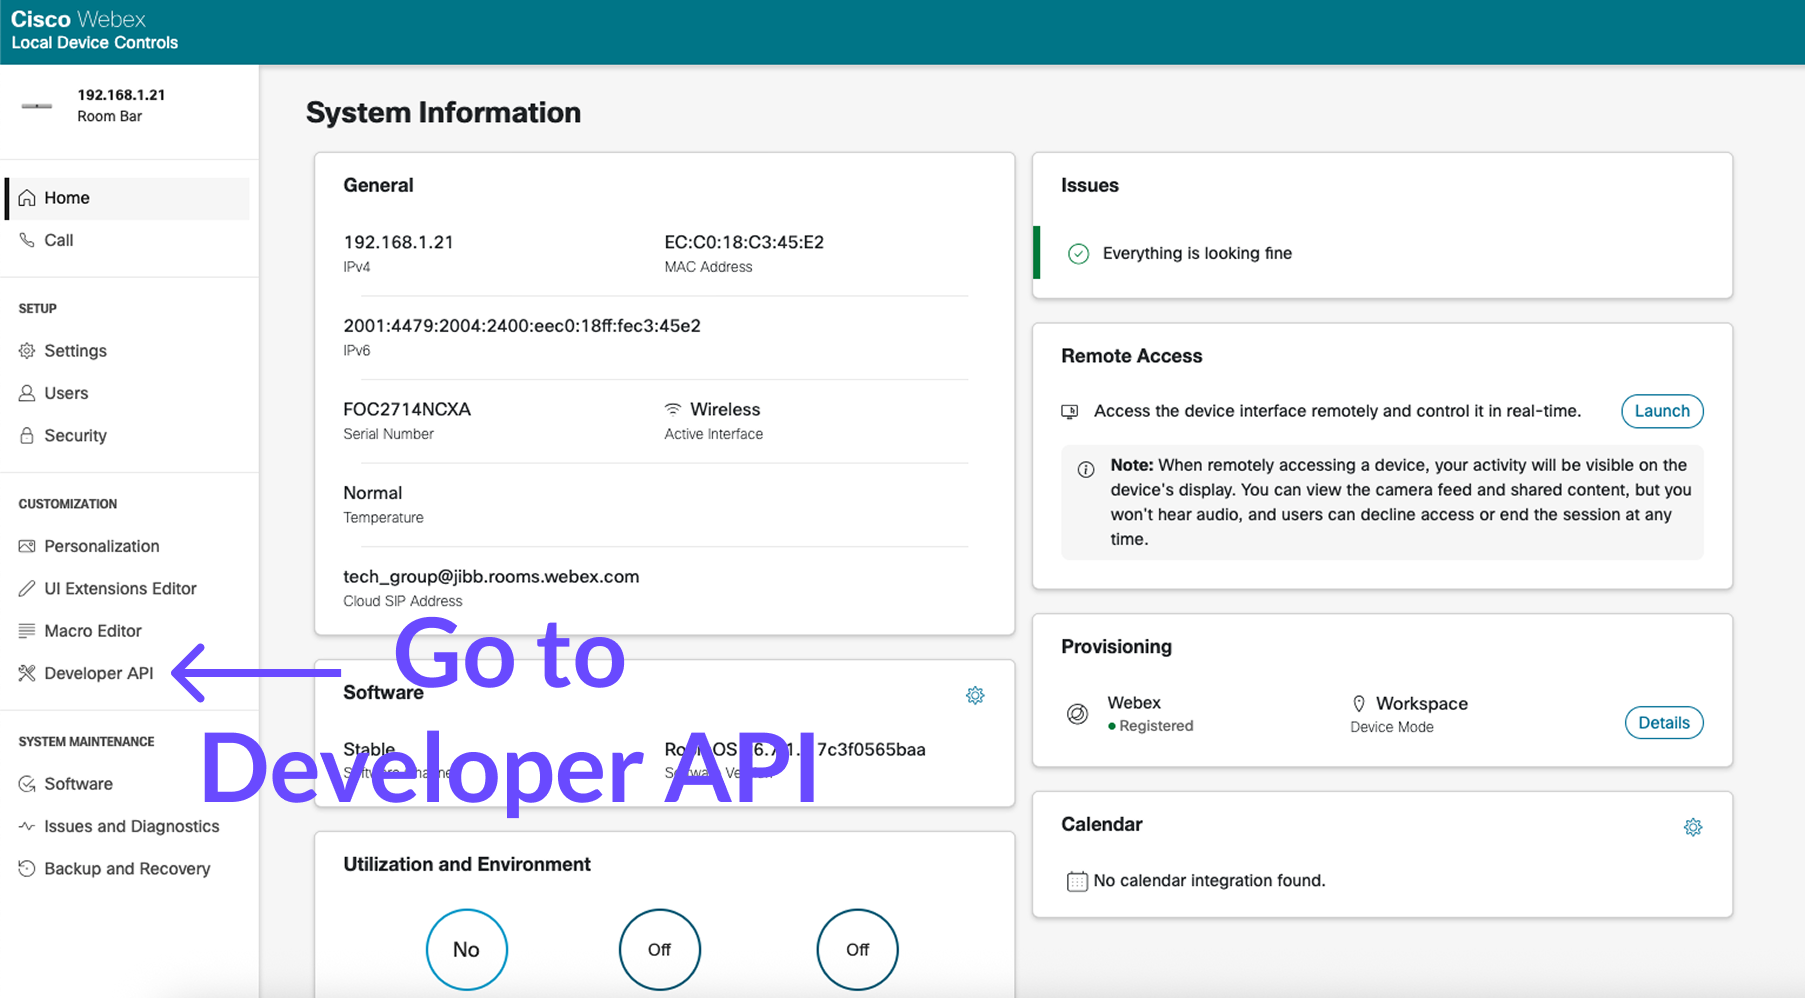
2.1 - Open the Developer API Tab
Log in to Webex Control Hub and open Local Device Controls for the device you want to install JIBB Room onto. Inside Local Device Controls, click on the Developer API tab.
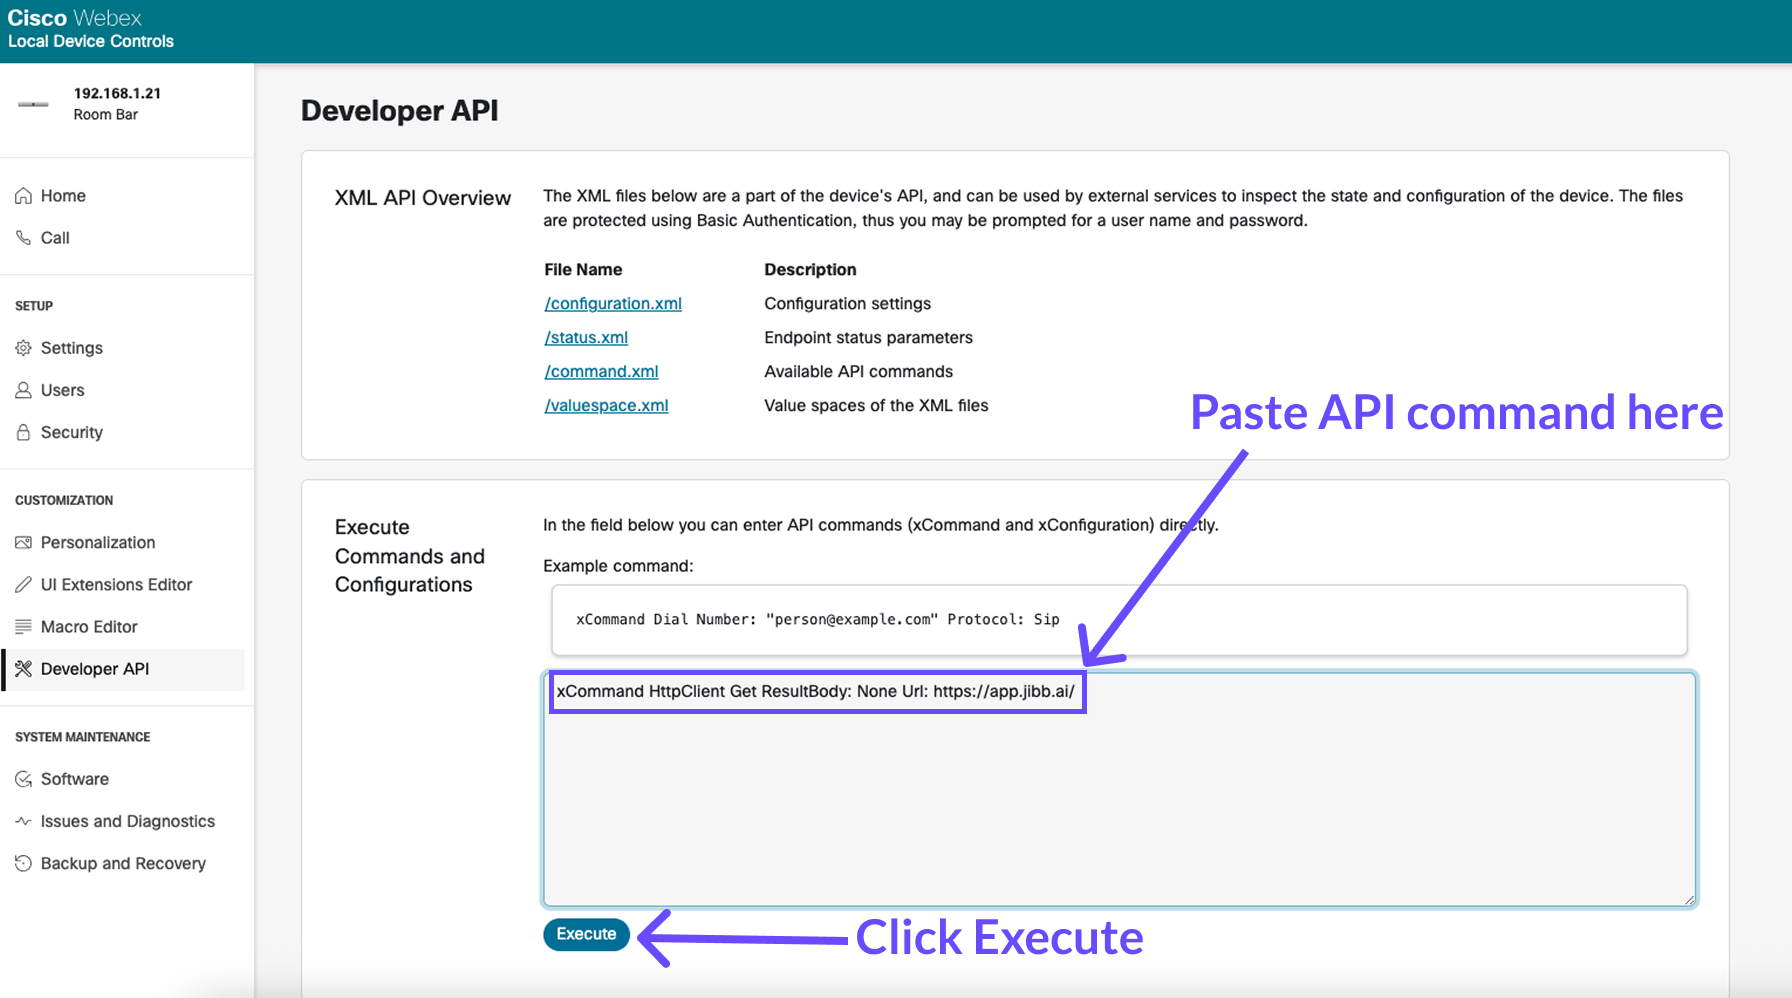
2.2 - Execute the API Command
In the command field, paste the following command and click Execute:
xCommand HttpClient Get ResultBody: None Url: https://app.jibb.ai/
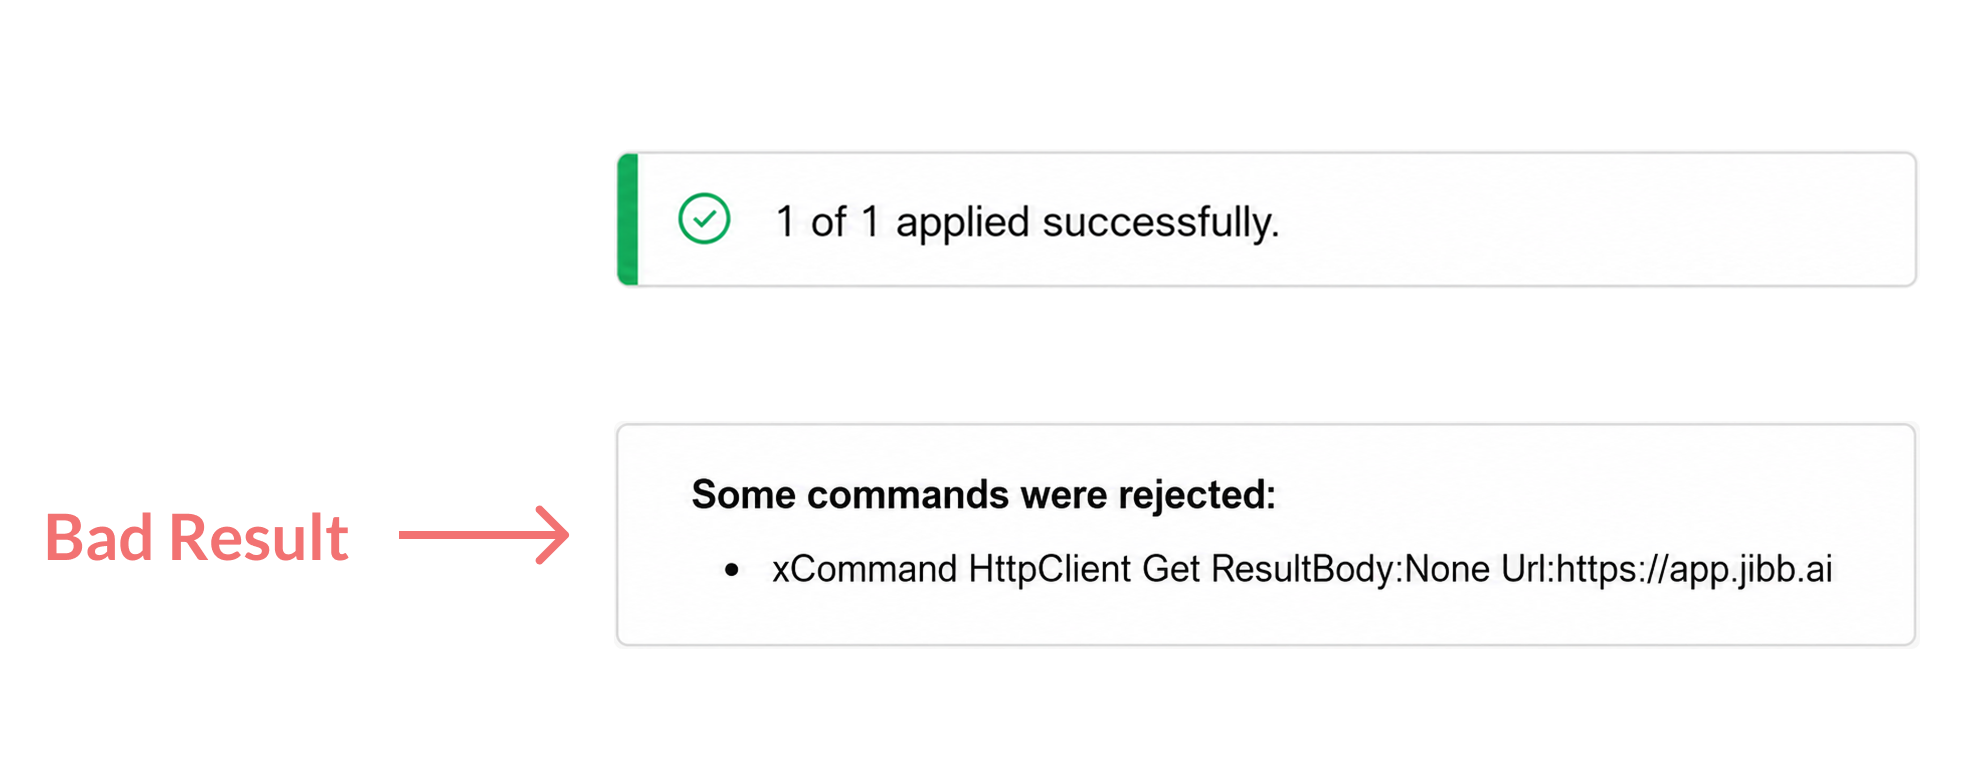
2.3 - Interpret the Result
- A response of "1 of 1 applied successfully" with a green tick means your network is not blocking JIBB. You can proceed with the installation of JIBB Room.
- A response of "some commands were rejected" means JIBB is likely being blocked by your firewall or proxy settings. Continue to Step 3.
3. Adjust Firewall / Proxy Settings
If Step 1 or Step 2 indicates that JIBB is being blocked, update your network settings so the required domains can be reached.
3.1 - Whitelist Essential Domains
Make sure the following domains are whitelisted in your firewall and proxy settings to allow JIBB Room to operate on your network:
3.2 - Contact Your IT Administrator
If you're not sure how to adjust these settings, contact your IT administrator. Provide them with the domains listed above and request that they ensure these are not blocked by your network's firewall or proxy.
Still Need Help?
If you didn’t find the answer here or need help with something more specific, our support team is ready to assist. Use the options below to get personal support or raise an issue.